
Building a driveway is more than choosing an attractive surface. The best plan connects layout, drainage, excavation, base preparation, edging, landscaping, and the architectural character of the home. A durable granular base supports vehicle loads while helping manage water beneath the finished surface, so preparation matters as much as appearance. () Before digging, confirm property lines, locate underground utilities, review local permit rules, and study how rainwater moves across the yard. Your climate, soil, slope, maintenance expectations, and budget will help determine whether gravel, asphalt, concrete, brick, or pavers make sense. The complete driveway designs below explain practical ways to coordinate these decisions. Use these **20 How To Build A Driveway Ideas** to create a functional, welcoming approach to your home.

1. Gravel Driveway With Stone Edging
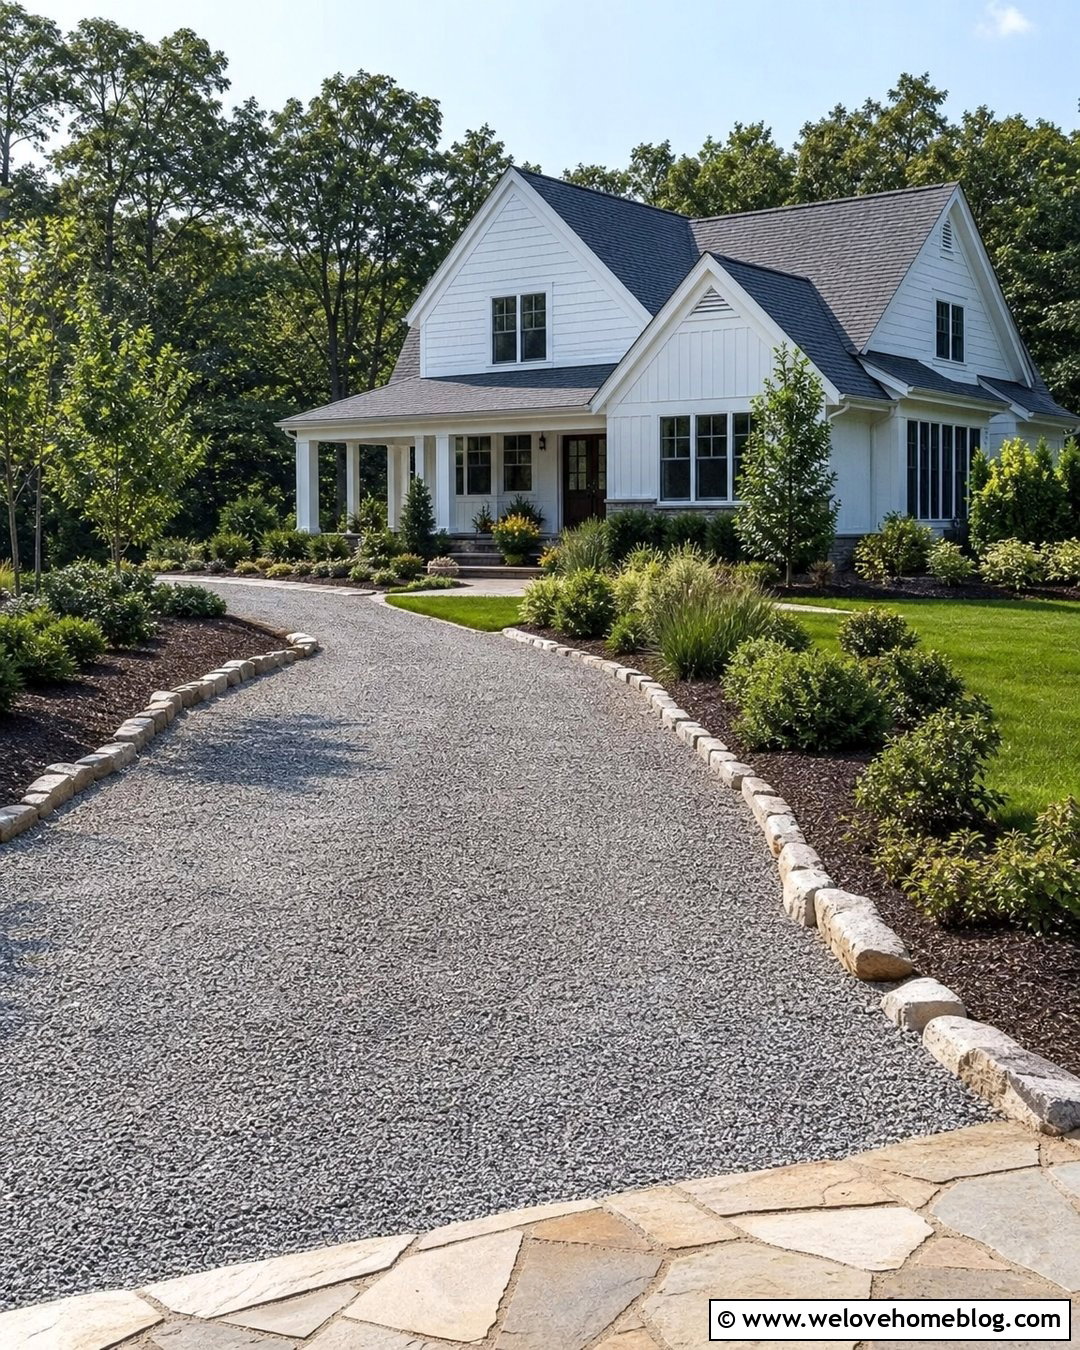
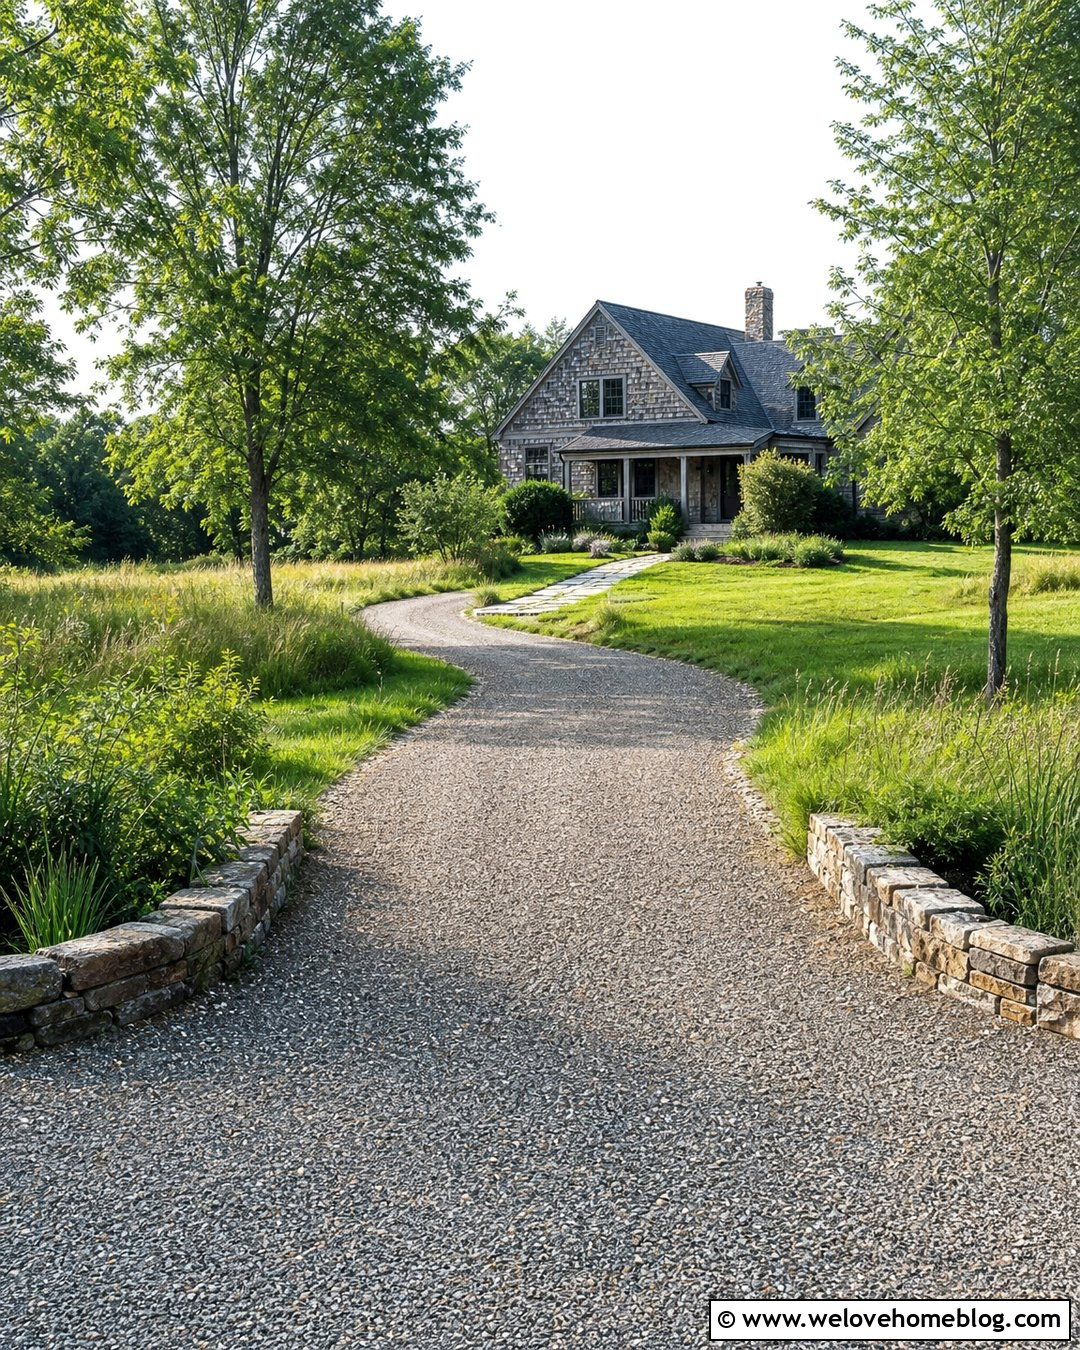
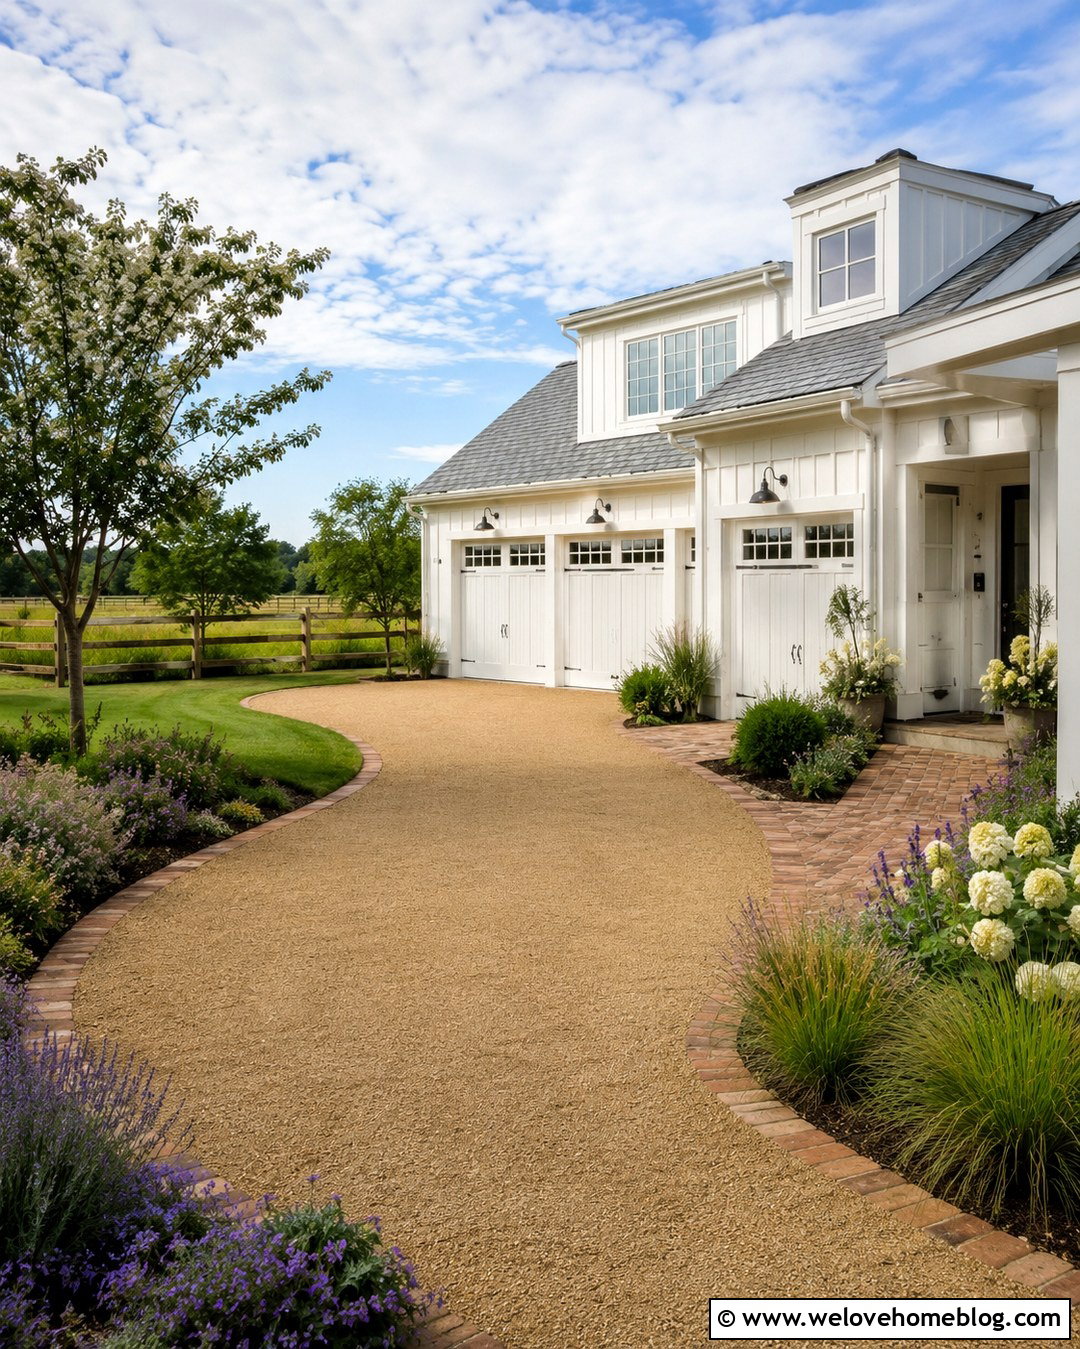
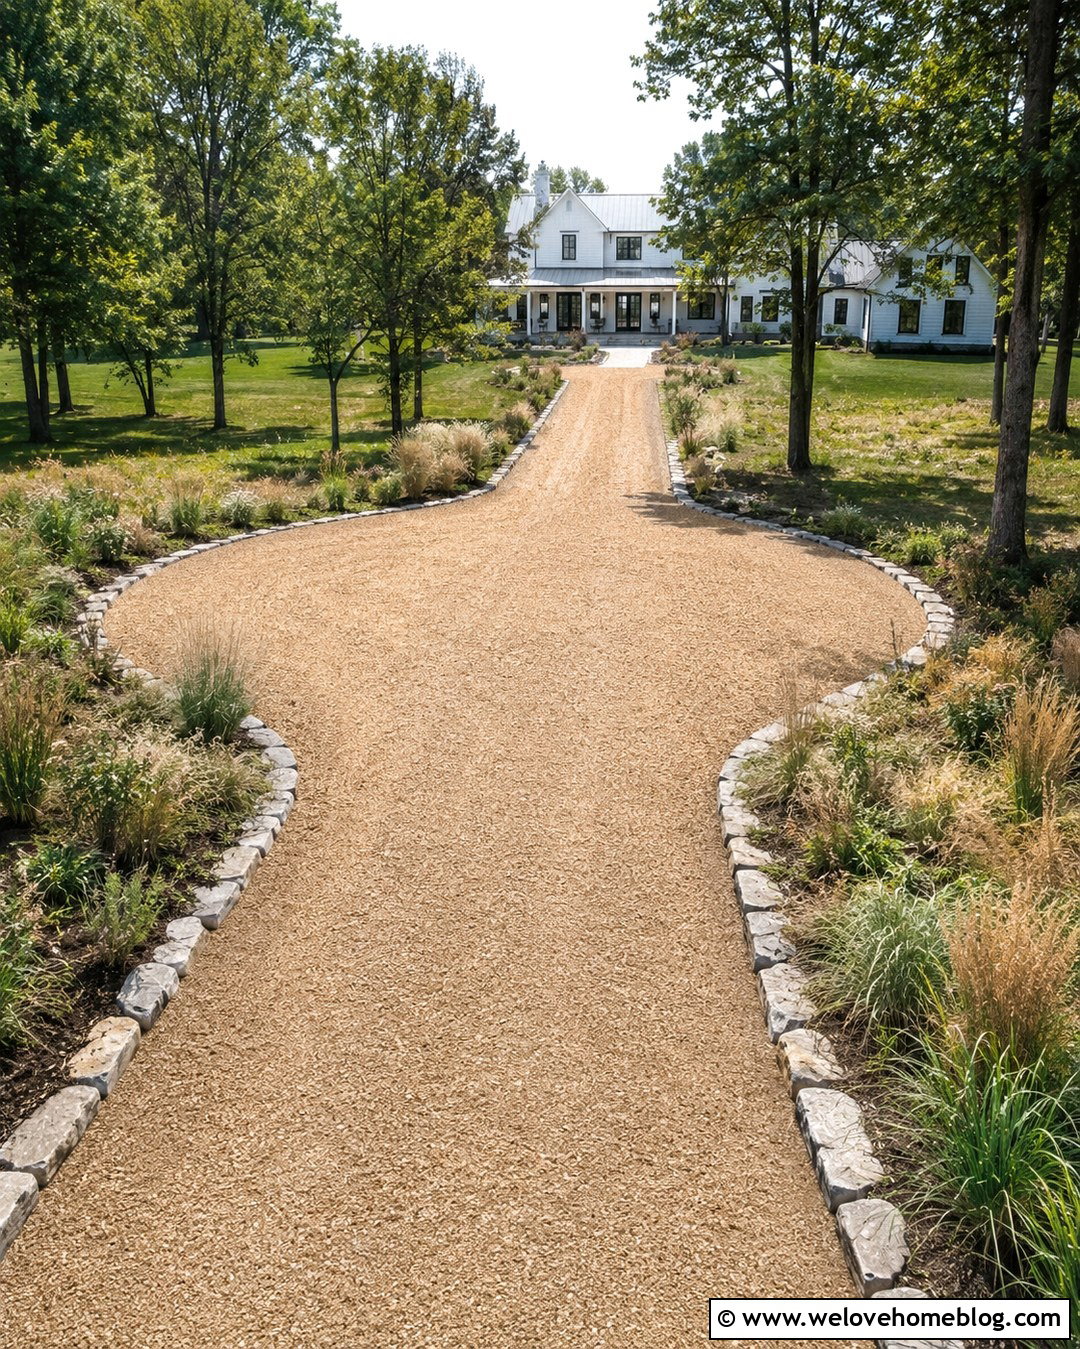
A gravel driveway is a practical starting point when you want an affordable surface with a relaxed appearance. Mark a straight or gently curved layout, remove vegetation and soft topsoil, then grade the subsoil so water moves away from buildings. Install geotextile where soft soil could mix with the stone. Add a compacted base of angular crushed aggregate in manageable layers before spreading the decorative gravel. Angular material locks together better than smooth river rock in structural base layers. Finish the design with fieldstone edging, broad planting beds, and low shrubs that will not spill into the driving area. A slightly raised center can help shed rain toward landscaped sides, while a stone apron near the street keeps loose gravel contained.
2. Crushed Stone Driveway With Timber Borders
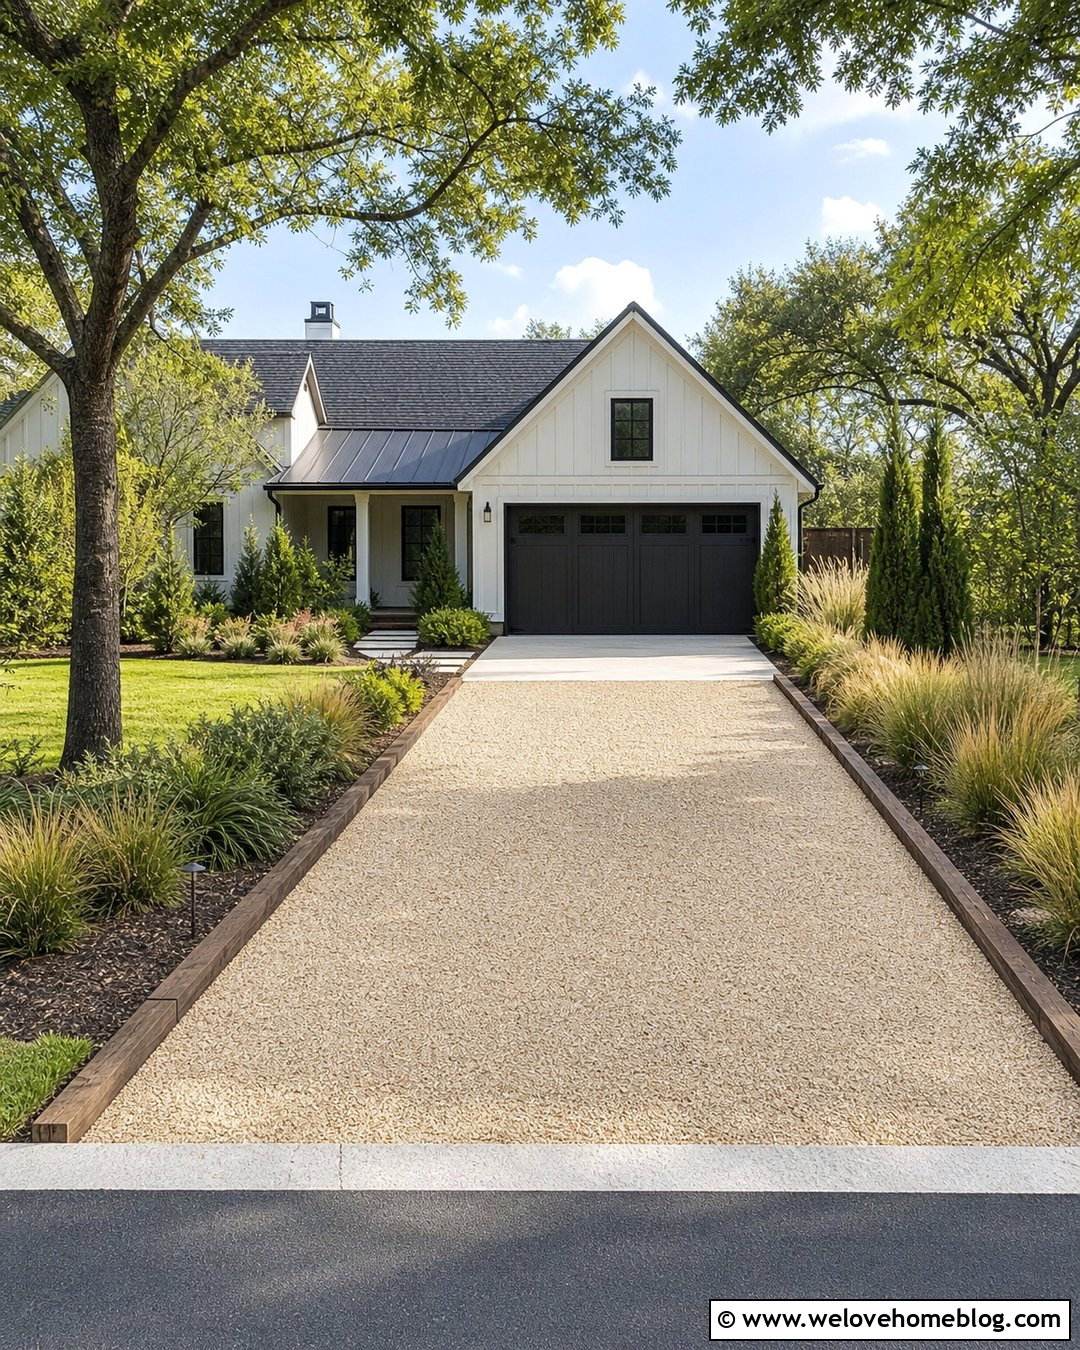
The crisp texture of crushed stone works especially well beside a farmhouse, ranch home, or wooded property. Begin with a driveway width that allows comfortable vehicle movement without overwhelming the front yard. Excavate weak soil, establish the correct grade, and compact the subgrade before installing separation fabric and multiple layers of crushed aggregate. Use larger stone below and a finer, compactable crushed stone at the surface. Pressure-treated landscape timbers can create simple borders, but they should be anchored firmly and positioned where water cannot collect against them. Frame the complete driveway with native grasses, evergreen shrubs, and a stepping-stone walkway. At the garage, install a stable concrete or paver transition so tires do not push loose stone onto the slab.
3. Pea Gravel Driveway With Paver Ribbons
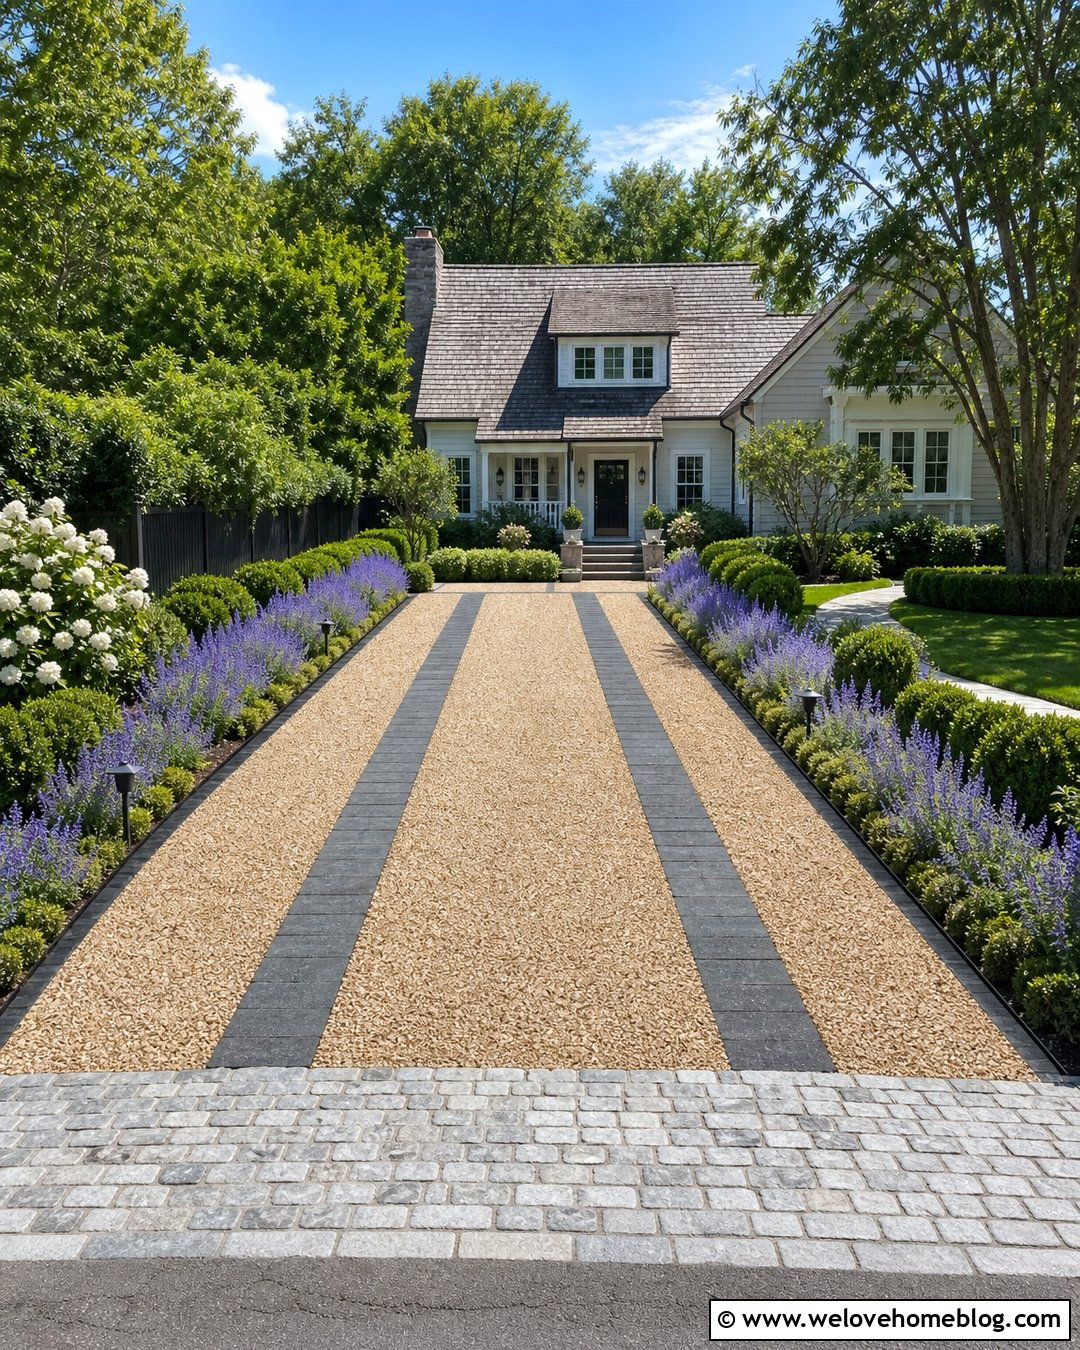
Pea gravel brings soft color and a refined garden look, but its rounded pieces can shift under tires. Build the driveway around that limitation. Prepare a properly compacted angular aggregate base, then add cellular gravel stabilization grids before spreading a shallow layer of pea gravel. The grids reduce migration and help keep the finished surface more even. Add two parallel concrete paver ribbons where vehicle tires normally travel, creating firmer tracks and a clear visual direction toward the garage. Secure the perimeter with steel, stone, or concrete restraints rather than relying on loose soil. Lavender, catmint, compact boxwood, and ornamental grasses can soften the edges without blocking sightlines. A contrasting cobblestone apron at the curb completes the driveway and helps retain displaced gravel.
4. Asphalt Driveway With Brick Edging
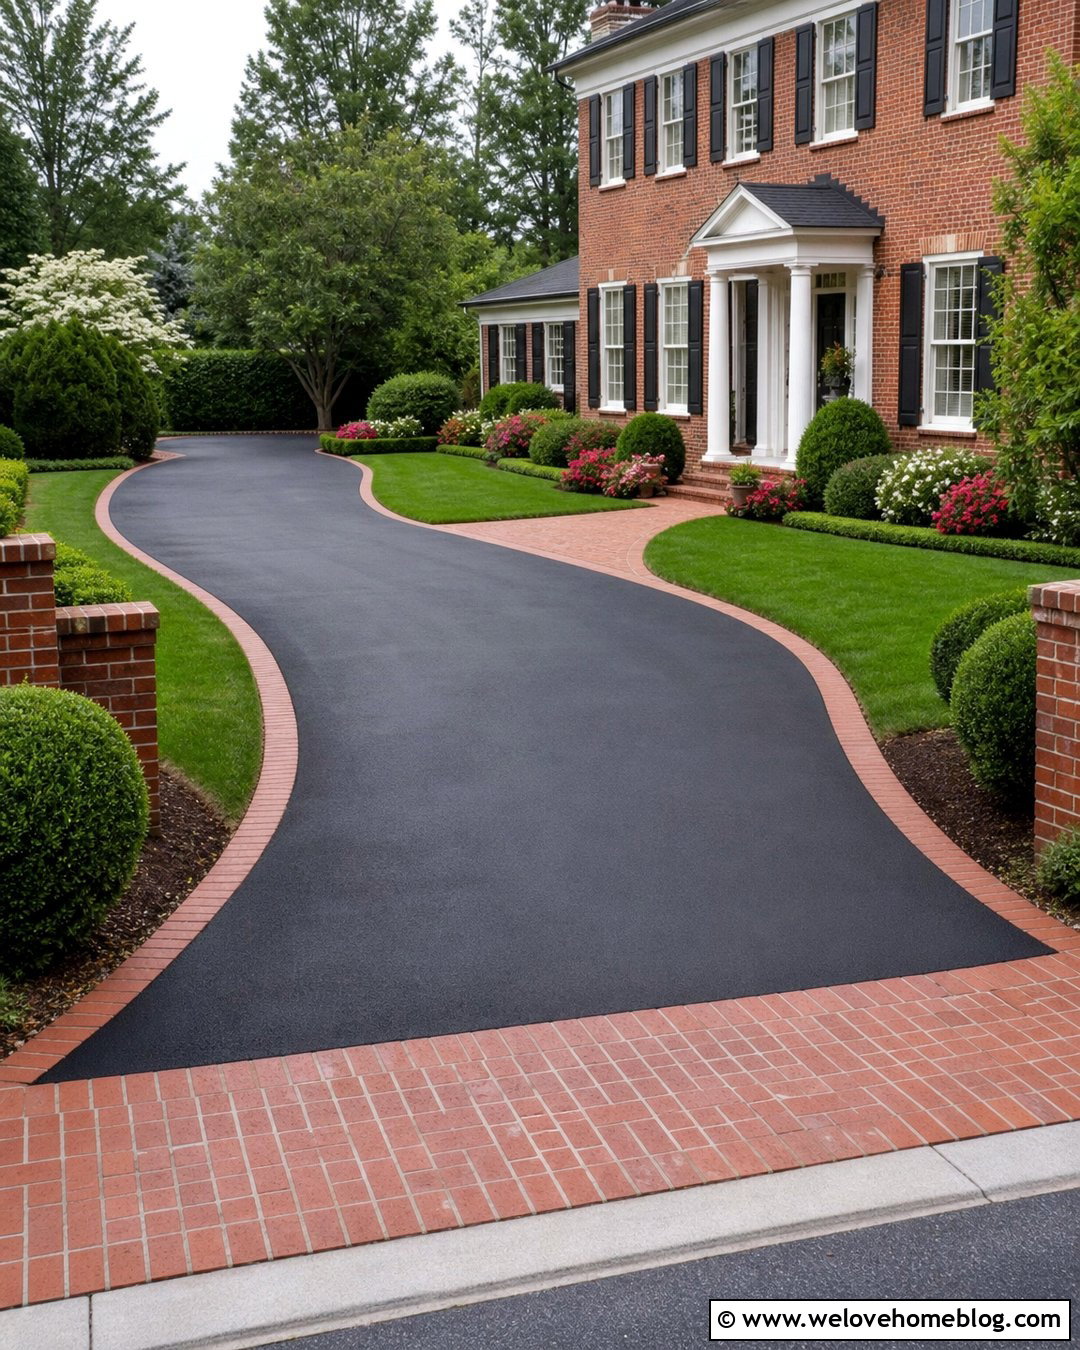
Smooth black asphalt creates a clean, familiar driveway that suits many suburban homes. Construction should begin with soil evaluation, excavation, drainage planning, and thorough subgrade compaction. Depending on local soil and climate, asphalt may be installed over a compacted aggregate base or designed as a full-depth asphalt system. Industry guidance emphasizes adequate slope, stable subgrade conditions, and careful compaction for dependable performance. () Pair the dark surface with red or charcoal brick edging installed on a stable base with strong edge restraint. A gently curved layout can soften a wide front yard, while clipped shrubs and a separate brick walkway reinforce the border. Keep irrigation away from the pavement edge and direct roof runoff into suitable drains or planted areas instead of across the driveway.
5. Concrete Driveway With Broom Finish
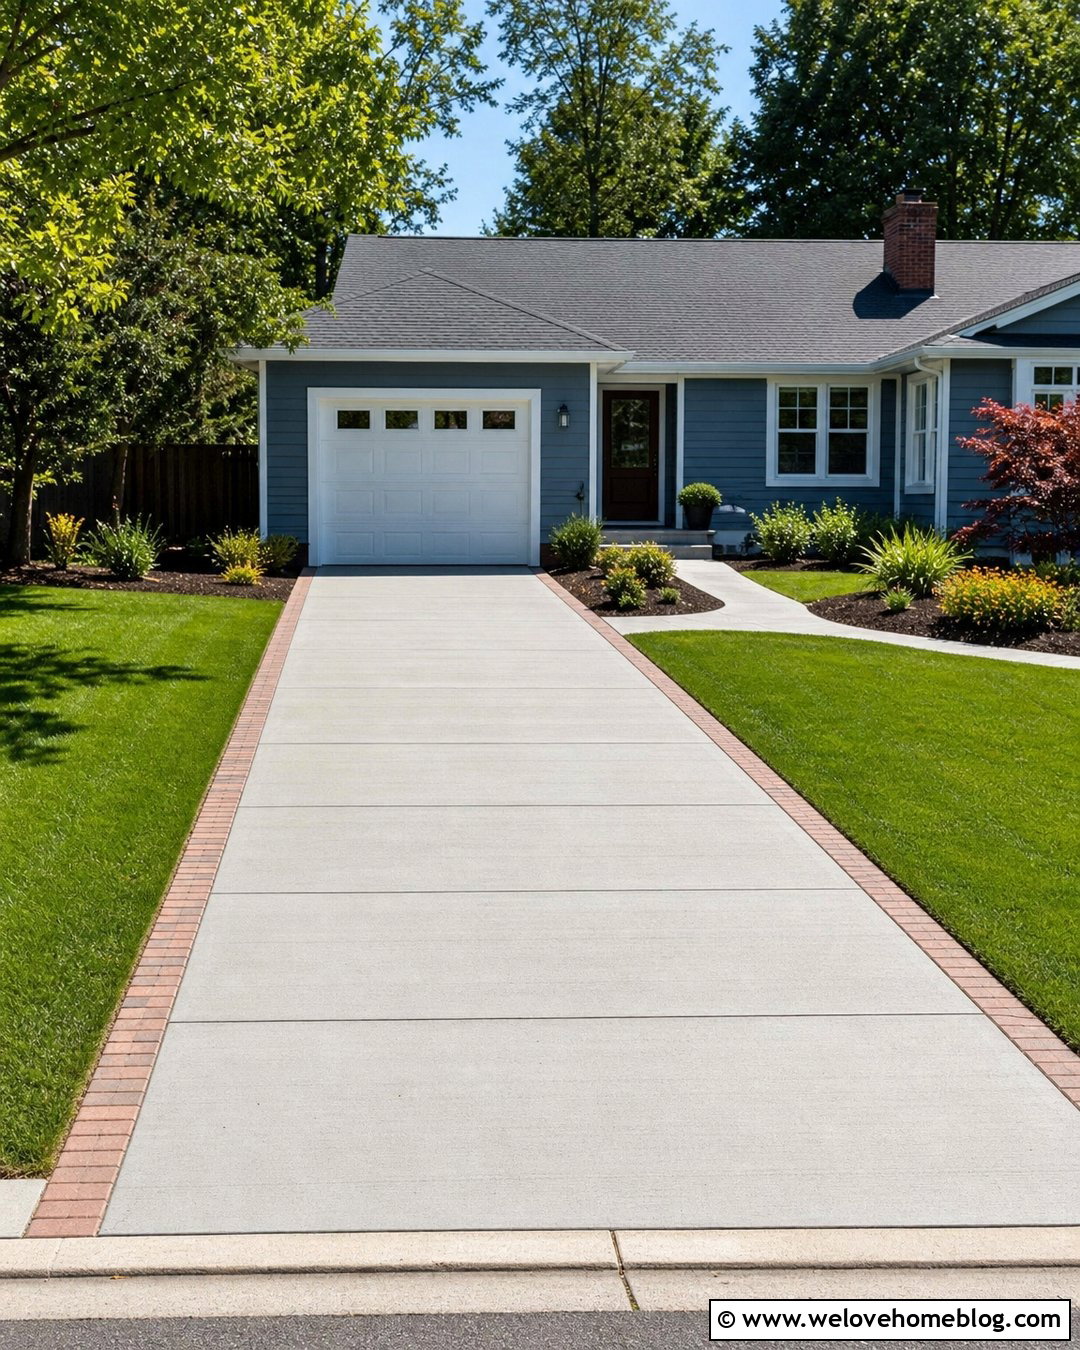
A broom-finished concrete driveway offers dependable traction and a simple appearance that works with almost any house. First establish the shape, finished elevation, drainage direction, and connection to the street. Excavate unsuitable material, compact the subgrade, and prepare the specified aggregate base. Forms should follow the planned slope and create consistent edges. Concrete thickness, reinforcement, joint spacing, and mix requirements should be selected for local soil, weather, and vehicle loads rather than guessed. After placement, the crew levels the concrete, applies the broom texture, cuts or forms control joints, and cures the slab correctly. Complete the look with a narrow brick border, lawn panels, foundation shrubs, and a walkway that branches naturally toward the front door. Avoid placing heavy vehicles on new concrete before it reaches suitable strength.
6. Exposed Aggregate Driveway With Concrete Borders
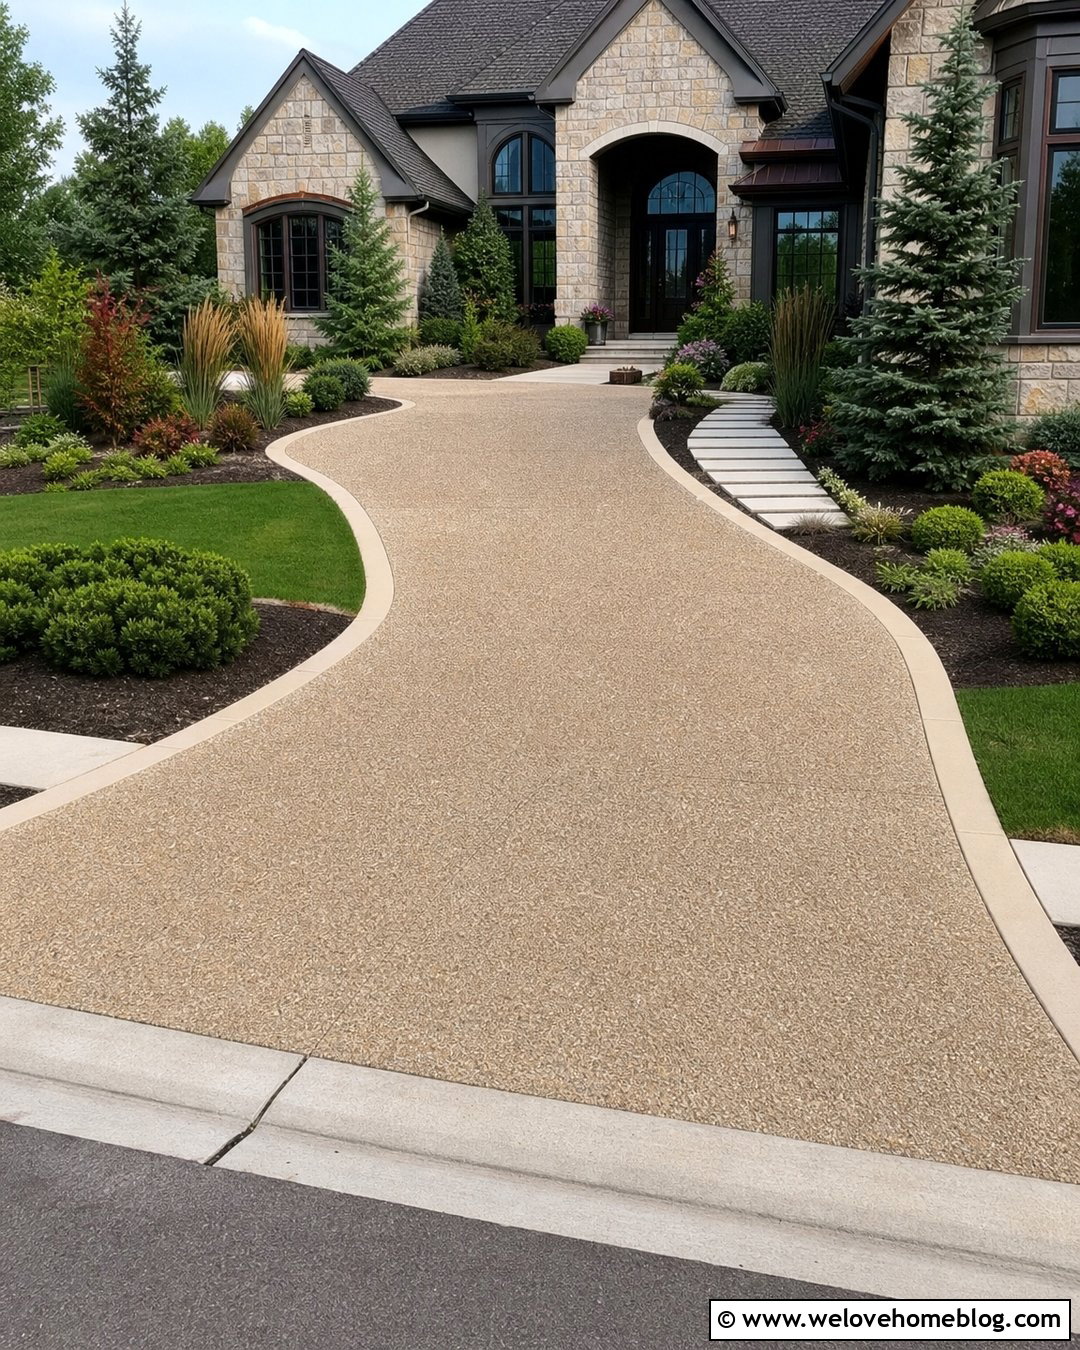
Would you like concrete durability with more visible texture? An exposed aggregate driveway reveals decorative stones at the surface while maintaining a solid paved structure. Plan a straight or sweeping layout, then prepare the subgrade and compacted base to the requirements of the site. Pour reinforced concrete within sturdy forms and use a surface treatment or controlled washing process to expose the aggregate consistently. Because timing affects the final texture, this finish is often best handled by an experienced concrete crew. Smooth poured-concrete borders can frame the rougher center and provide a neat transition to the garage, sidewalk, and lawn. Choose aggregate colors that coordinate with the home’s brick, siding, or stone veneer. Finish with restrained evergreen planting and broad mulch beds so the detailed driveway remains the visual focus.
7. Concrete Ribbon Driveway With Grass Center
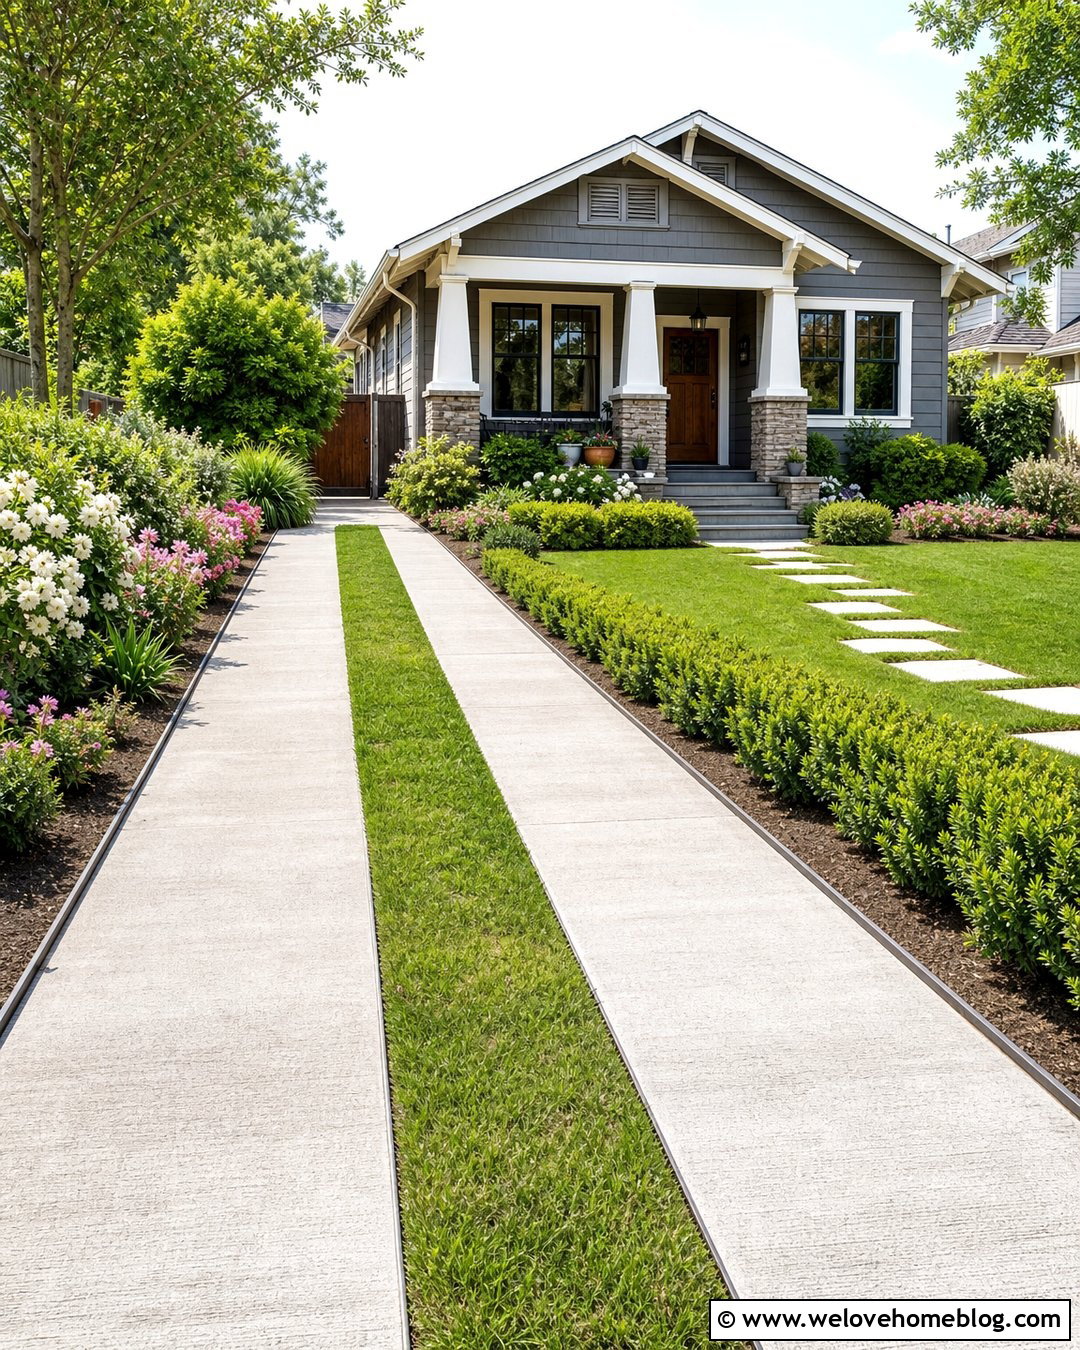
Two concrete wheel strips separated by grass can reduce the amount of hard paving in a small front yard. This driveway works best where vehicles follow a predictable path and frequent turning is unnecessary. Lay out the tire tracks carefully, accounting for vehicle width, garage position, and comfortable clearance. Excavate each strip, prepare a compacted base, set forms, and pour the concrete with appropriate reinforcement and control joints. The center should contain well-draining soil and durable turf, not loose topsoil that settles below the concrete. Grade it slightly lower than the strips so mowing remains easy without trapping water. Concrete or metal edging can protect nearby planting beds. Pair the driveway with a simple walkway, low hedges, and a cottage, bungalow, or modern farmhouse facade for an intentional garden-focused approach.
8. Concrete Paver Driveway In Herringbone Pattern
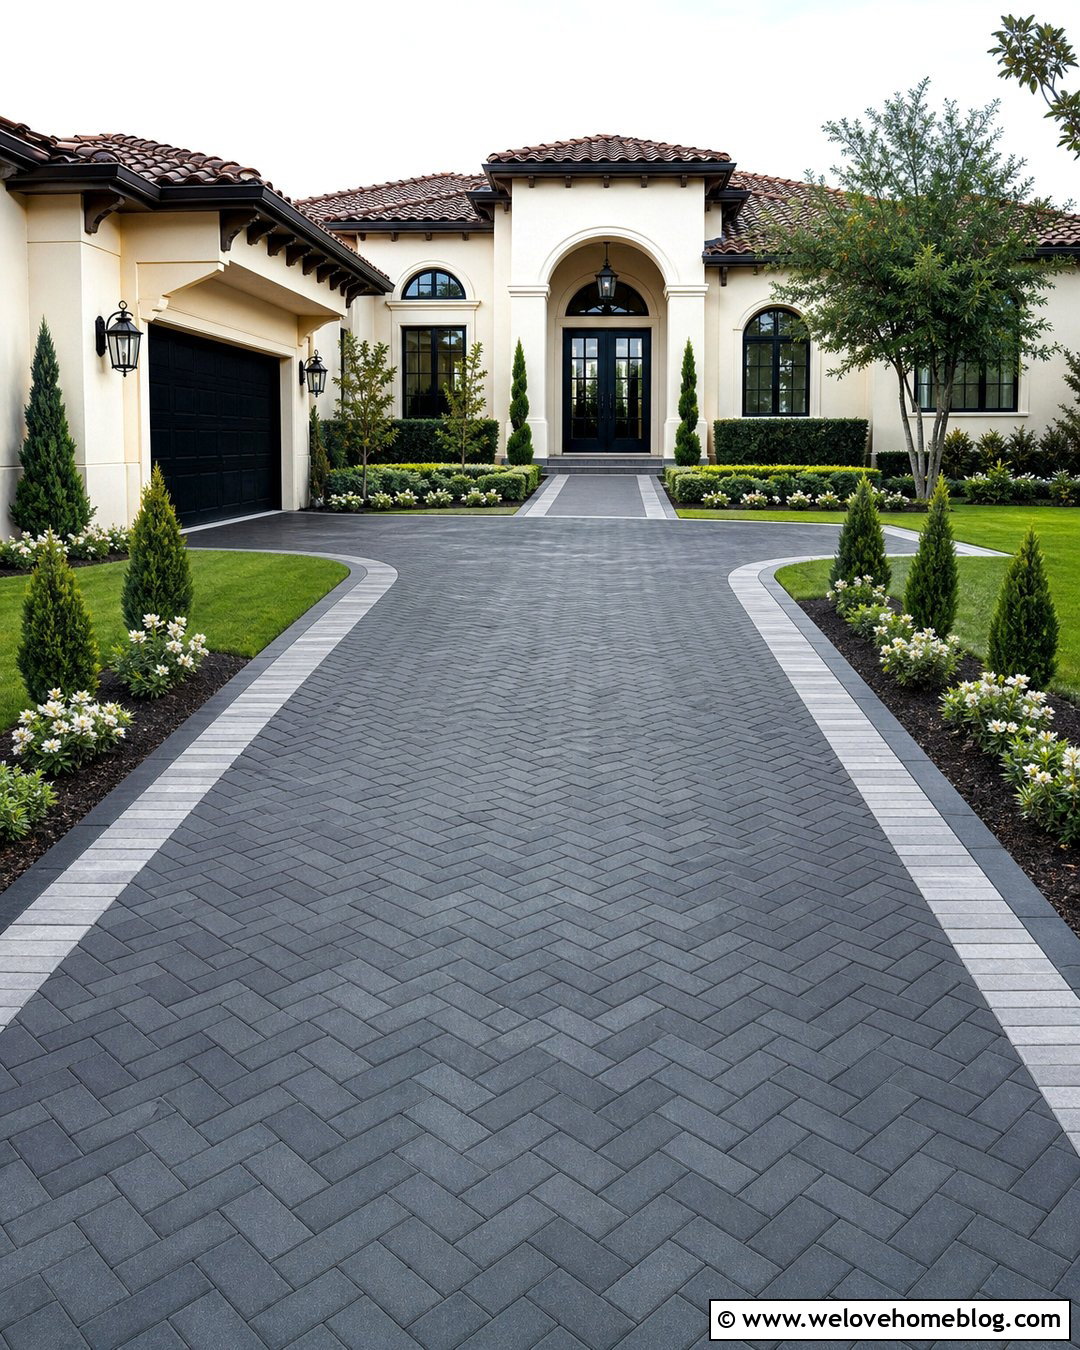
Interlocking concrete pavers create a detailed driveway that can be repaired in sections when necessary. A herringbone pattern is particularly suitable for a busy surface because the interlocking layout handles movement from multiple directions. Excavate to the calculated depth, compact the soil, and install geotextile if the soil conditions require separation. Build the aggregate base in compacted lifts, screed the bedding layer, and lay driveway-rated pavers inside rigid edge restraints. Guidance commonly starts with a six-inch aggregate base for residential driveways under favorable conditions, with additional depth needed for weak soil, poor drainage, freezing, or heavier loads. () Sweep jointing material into the joints and compact as specified. Add a contrasting paver border, structured shrubs, and a connected front walkway.
9. Permeable Paver Driveway With Rain Garden
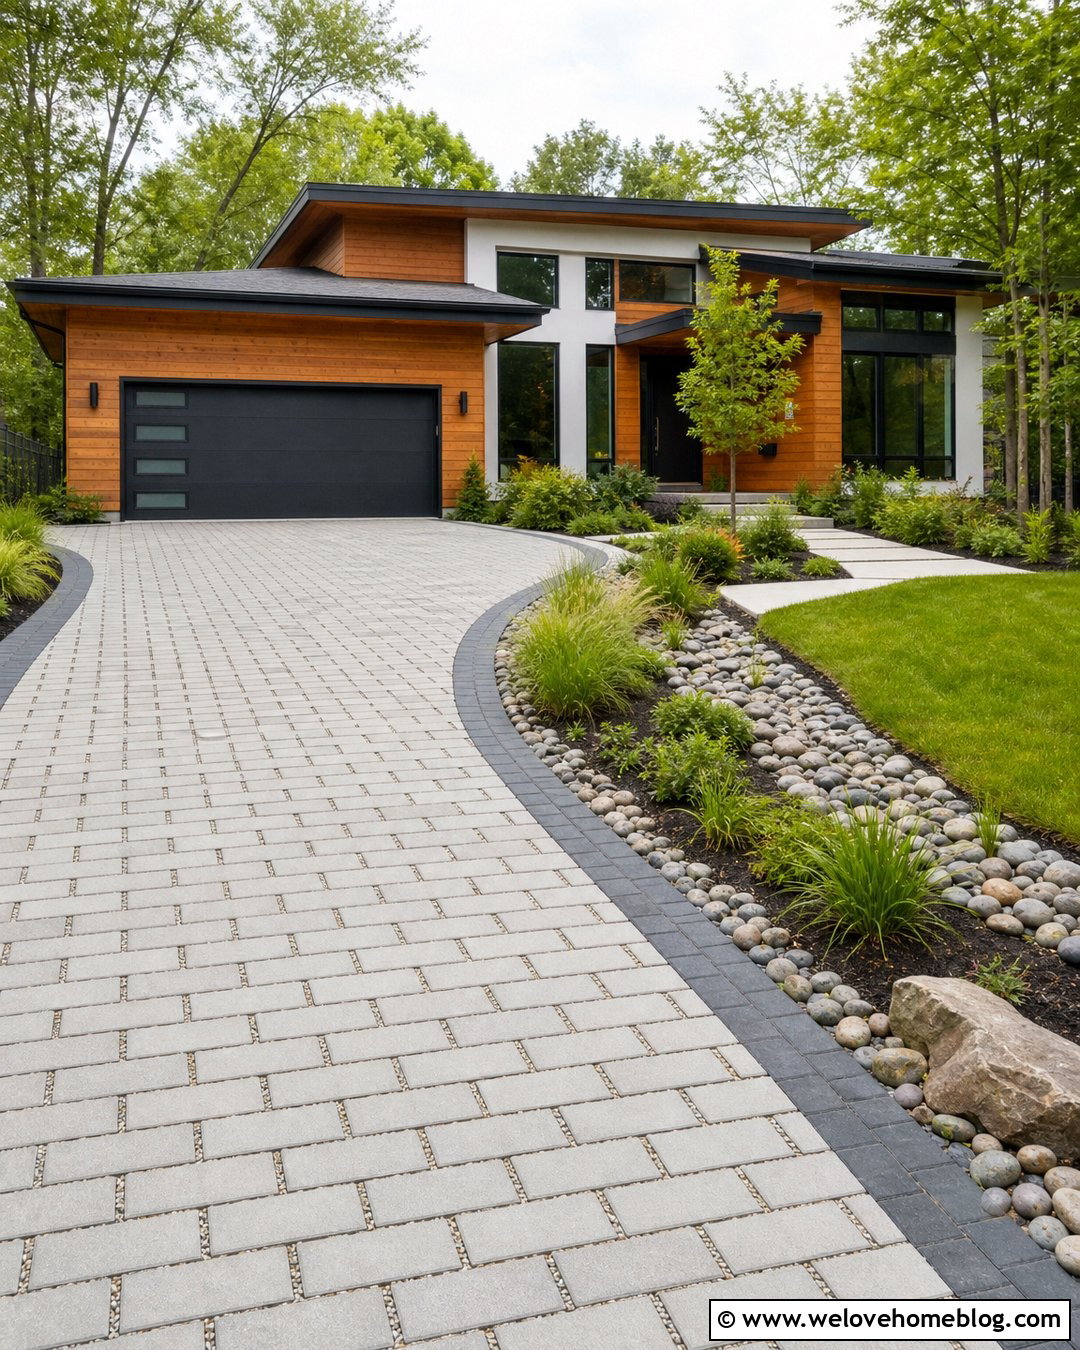
A permeable paver driveway can turn the vehicle area into part of the property’s stormwater plan. Unlike a standard paver installation, the joints and underlying stone layers are designed to let water pass through and collect temporarily below the surface. Excavate only after confirming soil infiltration, groundwater, drainage outlets, and local requirements. Install the specified open-graded subbase, base, bedding aggregate, permeable pavers, and joint stone without replacing these materials with ordinary sand. Some sites may also require an underdrain or controlled outlet. () Direct suitable overflow toward a planted rain garden containing regionally appropriate moisture-tolerant plants. A charcoal paver border, stone-lined overflow path, and modern planting beds will make the system look deliberate. Keep sediment and landscape soil away from the permeable joints to prevent clogging.


10. Brick Driveway With Herringbone Layout
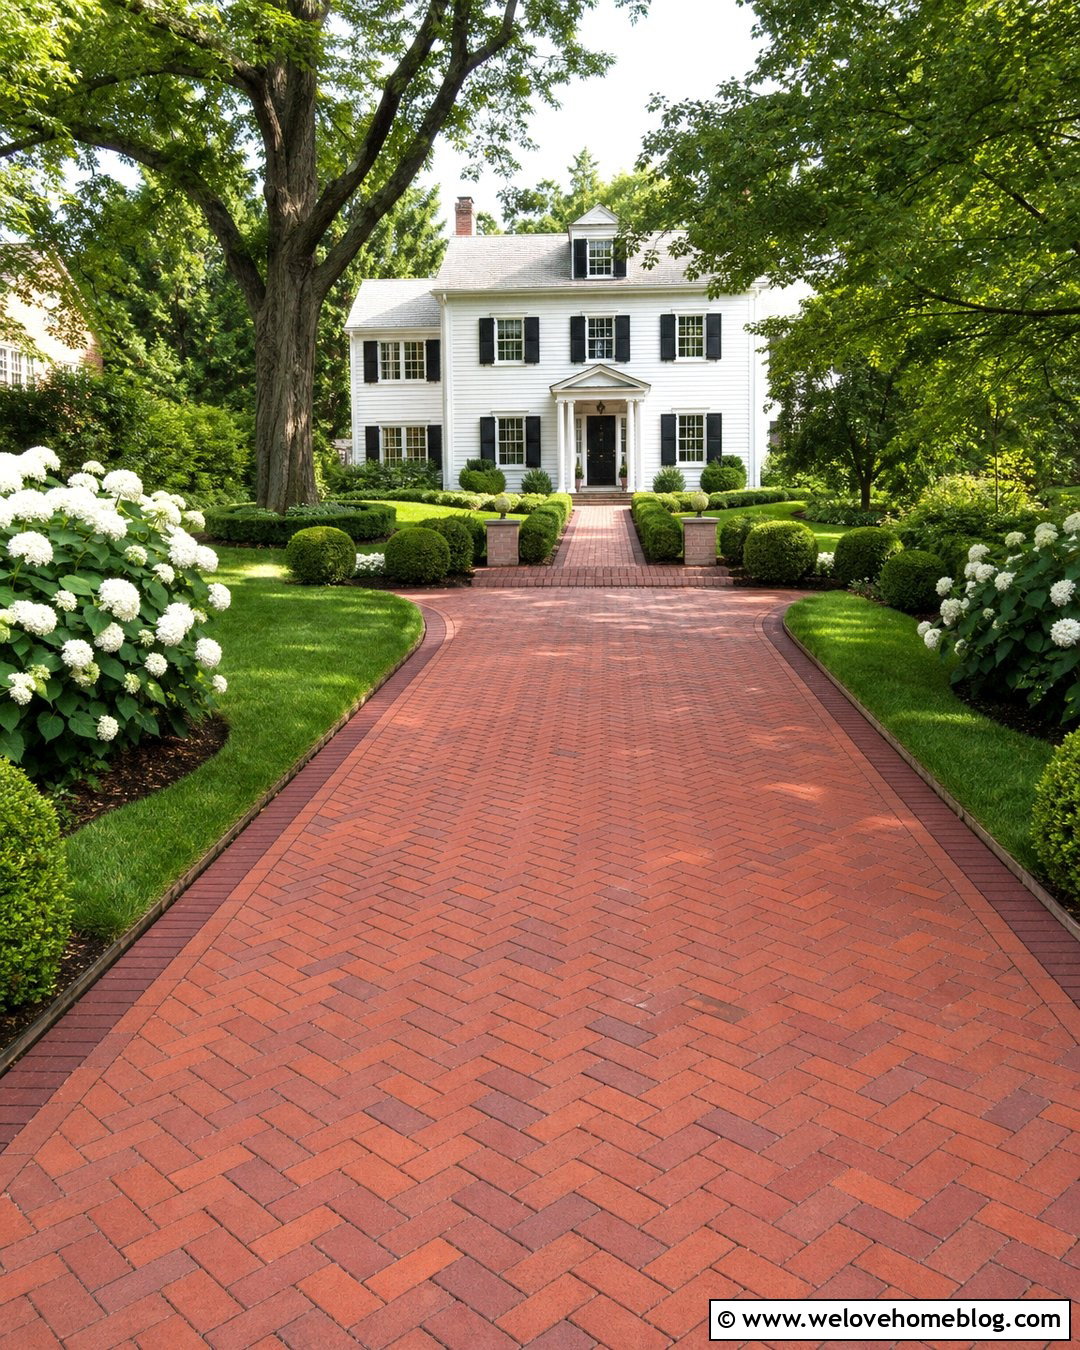
Warm clay brick creates a traditional driveway that complements Colonial, Cape Cod, Tudor, and cottage homes. Select genuine paving brick rated for vehicular use rather than wall brick, which is not designed for the same loads or exposure. Mark the driveway, establish drainage elevations, excavate, and compact the subgrade. Install the specified aggregate base and a consistent bedding layer before placing the bricks in a herringbone arrangement. Strong concrete or masonry edge restraints are essential because spreading edges can loosen the entire field. A darker brick soldier-course border gives the design a finished outline and simplifies cuts along the perimeter. Sweep suitable joint material into the gaps and compact according to the paving system. Complete the scene with curved lawn edges, clipped boxwood, flowering shrubs, and a matching brick path toward the entrance.
11. Gravel Driveway With Cobblestone Apron
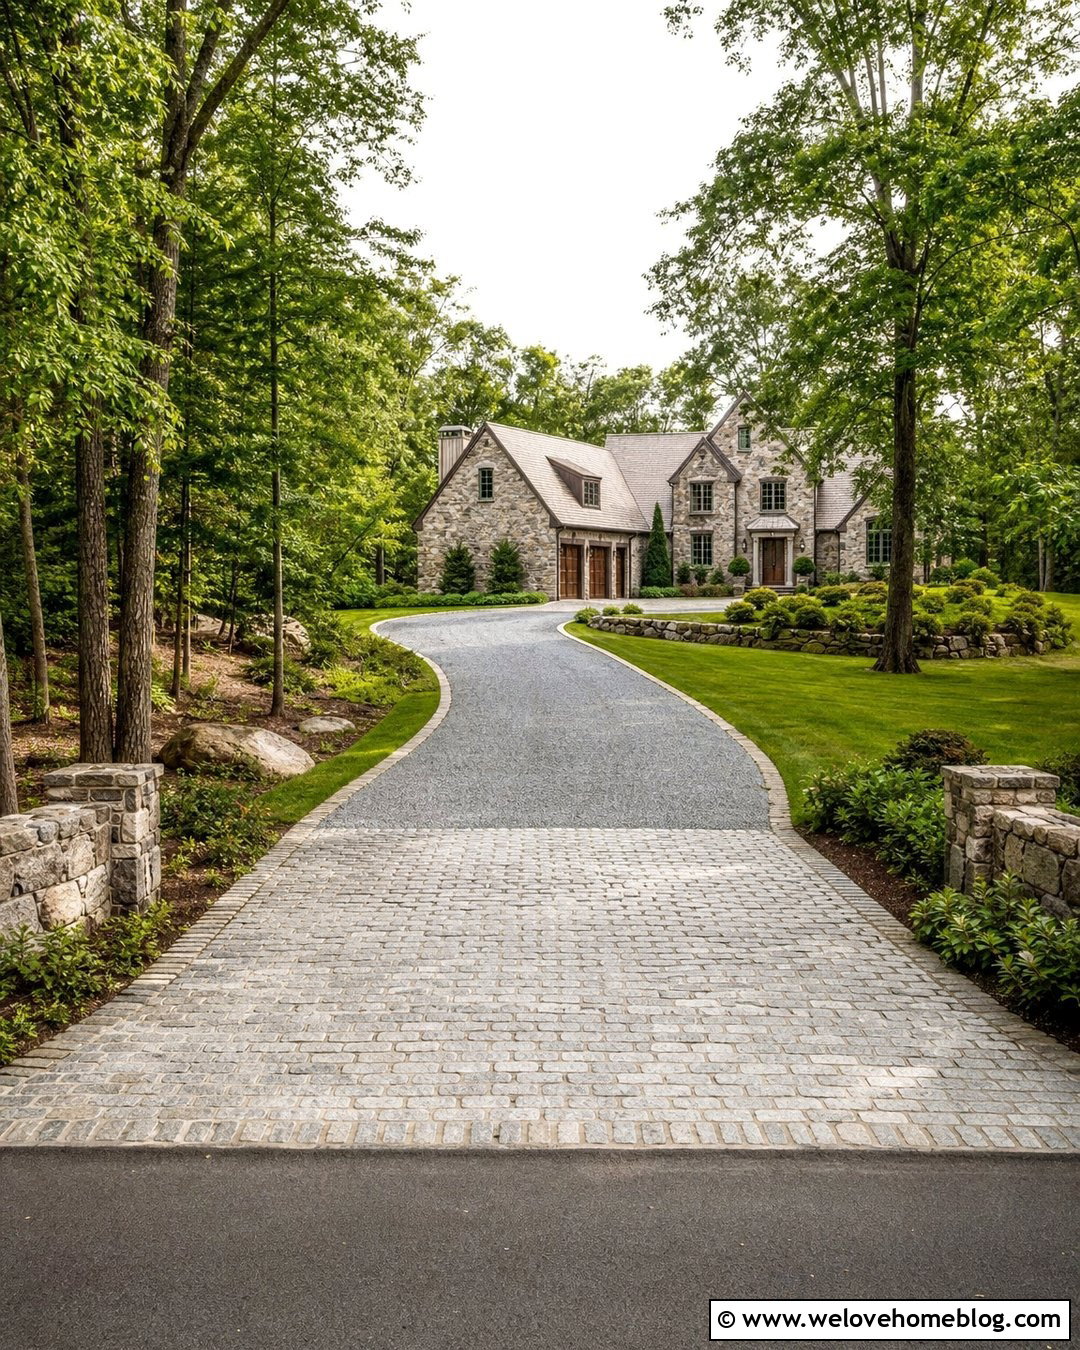
A cobblestone apron can give a gravel driveway a durable and polished connection to the street. Start by designing the full gravel approach, including turning space, garage alignment, drainage, and a stable compacted aggregate foundation. Build the apron separately on a base engineered for repeated braking, turning, and street-edge loads. Set granite cobbles in the specified bedding system and restrain them with concrete or substantial stone borders. Behind the apron, install angular gray gravel rather than deep, loose decorative stone that allows tires to sink. Continue the cobblestone along the sides for several feet to visually connect both surfaces. A curved layout, informal tree groups, and broad native planting beds suit a country property. Keep the public right-of-way clear and confirm local approval before changing the driveway connection or roadside drainage.
12. Resin-Bound Driveway With Stone Borders
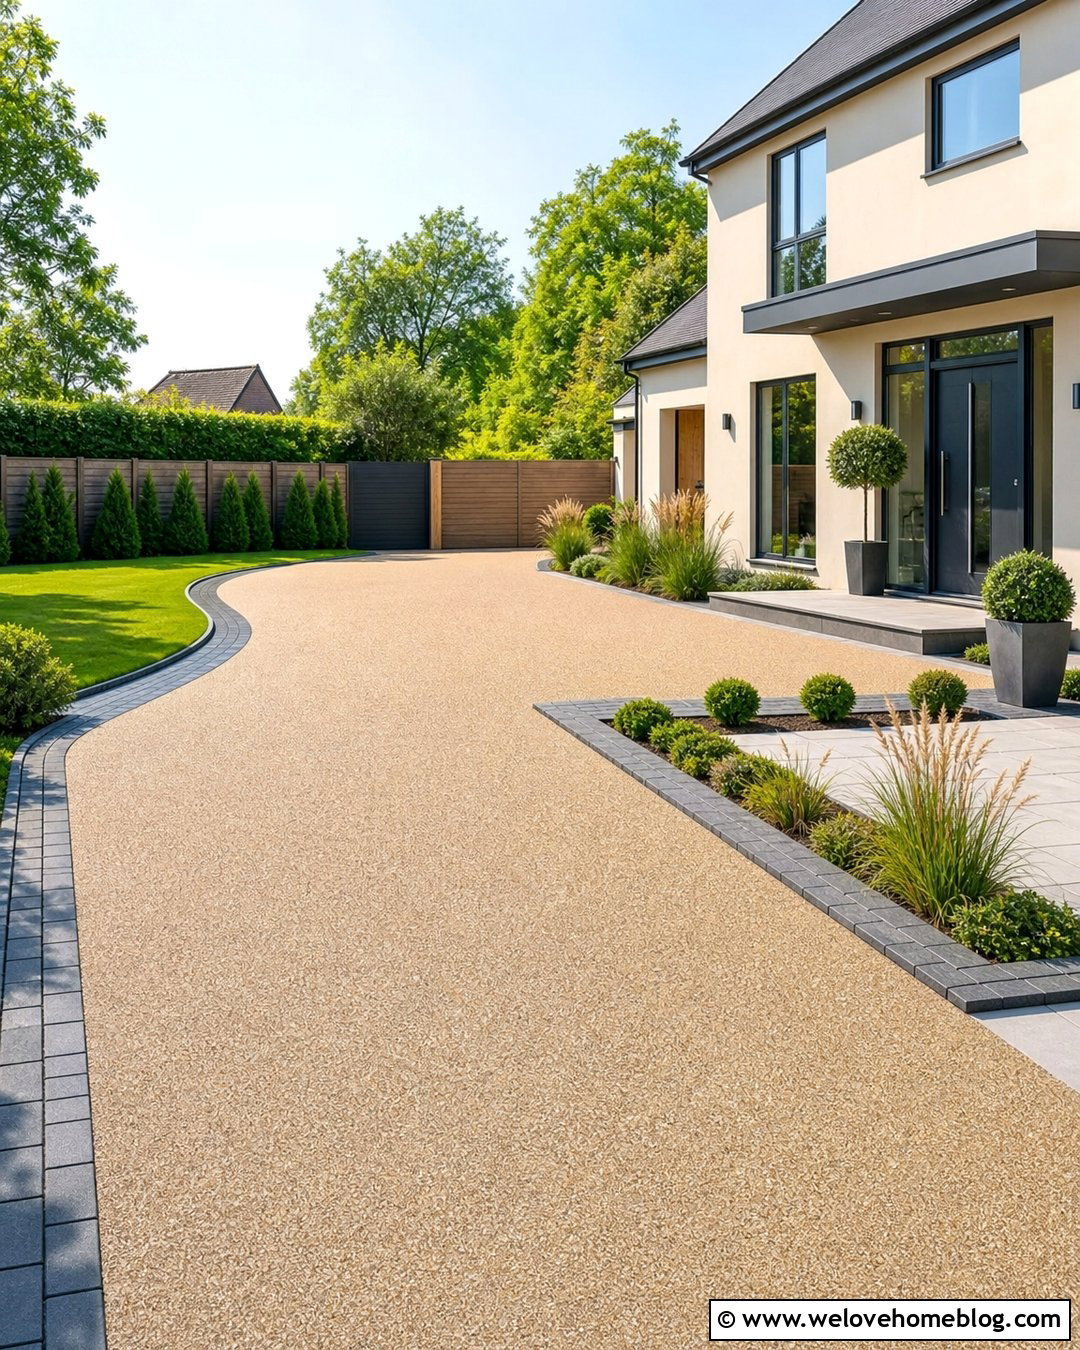
Resin-bound gravel produces a smooth, decorative surface made from aggregate mixed with resin before application. It differs from loose gravel because the stones form a continuous, firm layer. Begin with a sound, stable base designed for vehicle traffic, correct drainage, and the selected resin system. Existing asphalt or concrete may sometimes serve as a base, but only when it is structurally suitable and properly prepared. Choose a UV-stable product and aggregate blend appropriate for the climate and intended use. Skilled installation is important because mixing ratios, working time, temperature, moisture, and application depth influence the finish. Frame a warm beige resin-bound driveway with charcoal stone setts, neat planting beds, and a curved walkway. Avoid poorly planned low spots, since standing water and unsuitable bases can shorten the life of the surface.
13. Tar And Chip Driveway With Rustic Landscaping
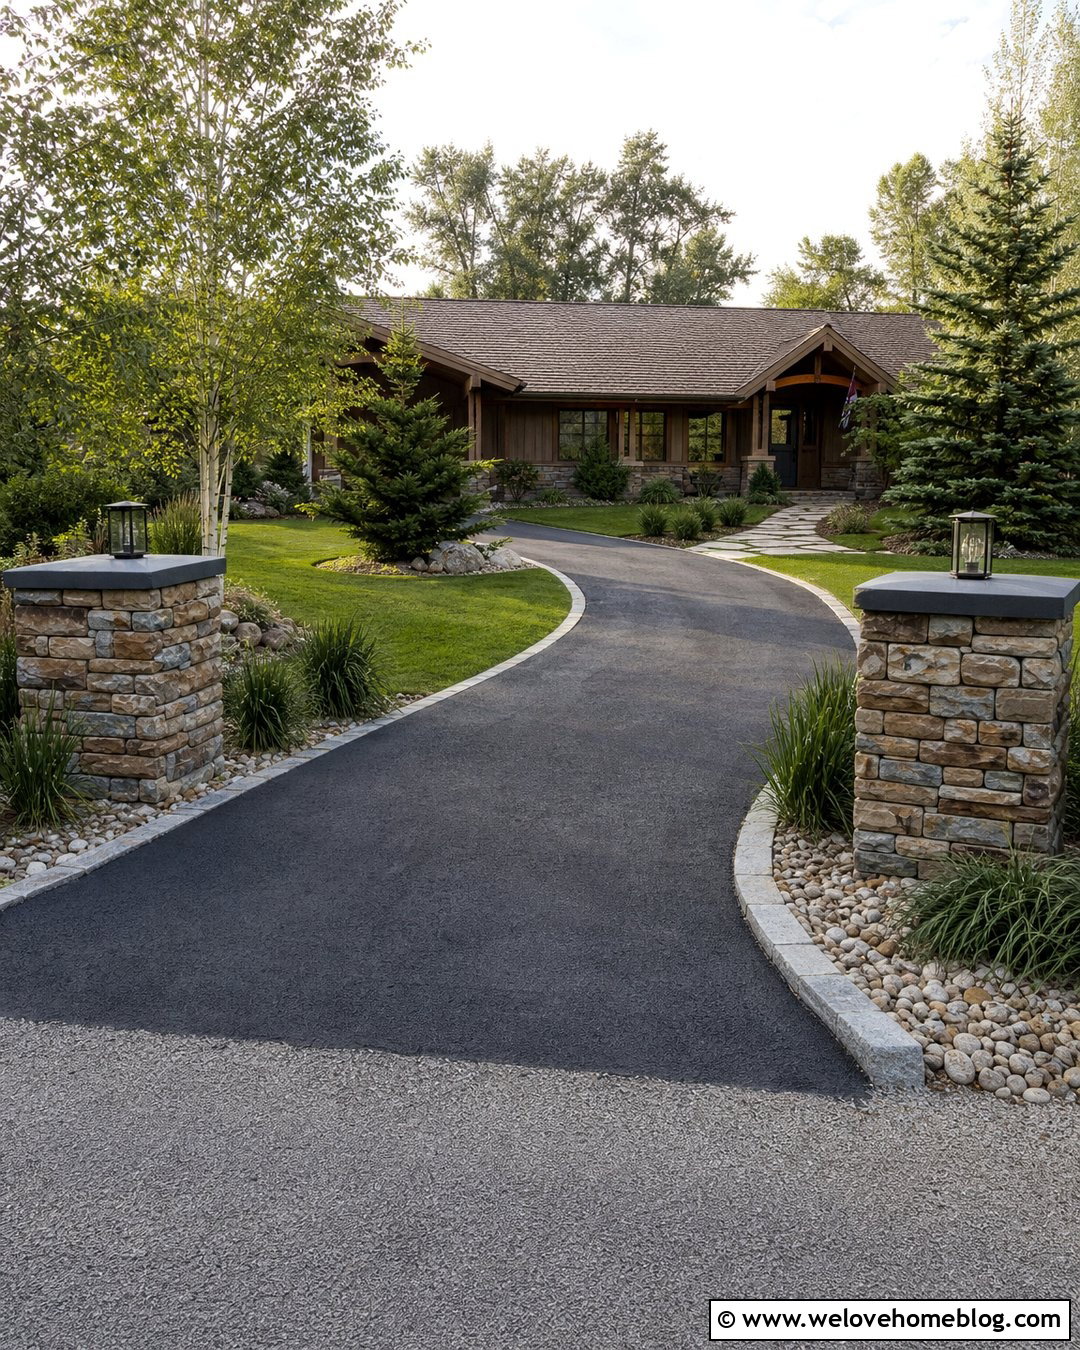
Tar-and-chip surfacing combines liquid asphalt with stone chips to create a textured appearance that sits between gravel and conventional asphalt. It is especially attractive on long rural driveways where plain black pavement might feel too formal. Begin by correcting drainage, removing unstable soil, and constructing a compacted aggregate base. The binder and selected stone chips are then applied with specialized paving equipment and rolled into place. This is generally a contractor-built surface rather than a simple weekend project. Choose tan, gray, or brown chips that complement the house and surrounding landscape. Add natural stone edging only where containment or visual definition is needed, leaving other edges informal. Native grasses, deciduous trees, and a broad entrance bed can frame the approach. Plan future resurfacing access before installing permanent gates, narrow columns, or delicate roadside features.
14. Circular Paver Driveway With Center Garden
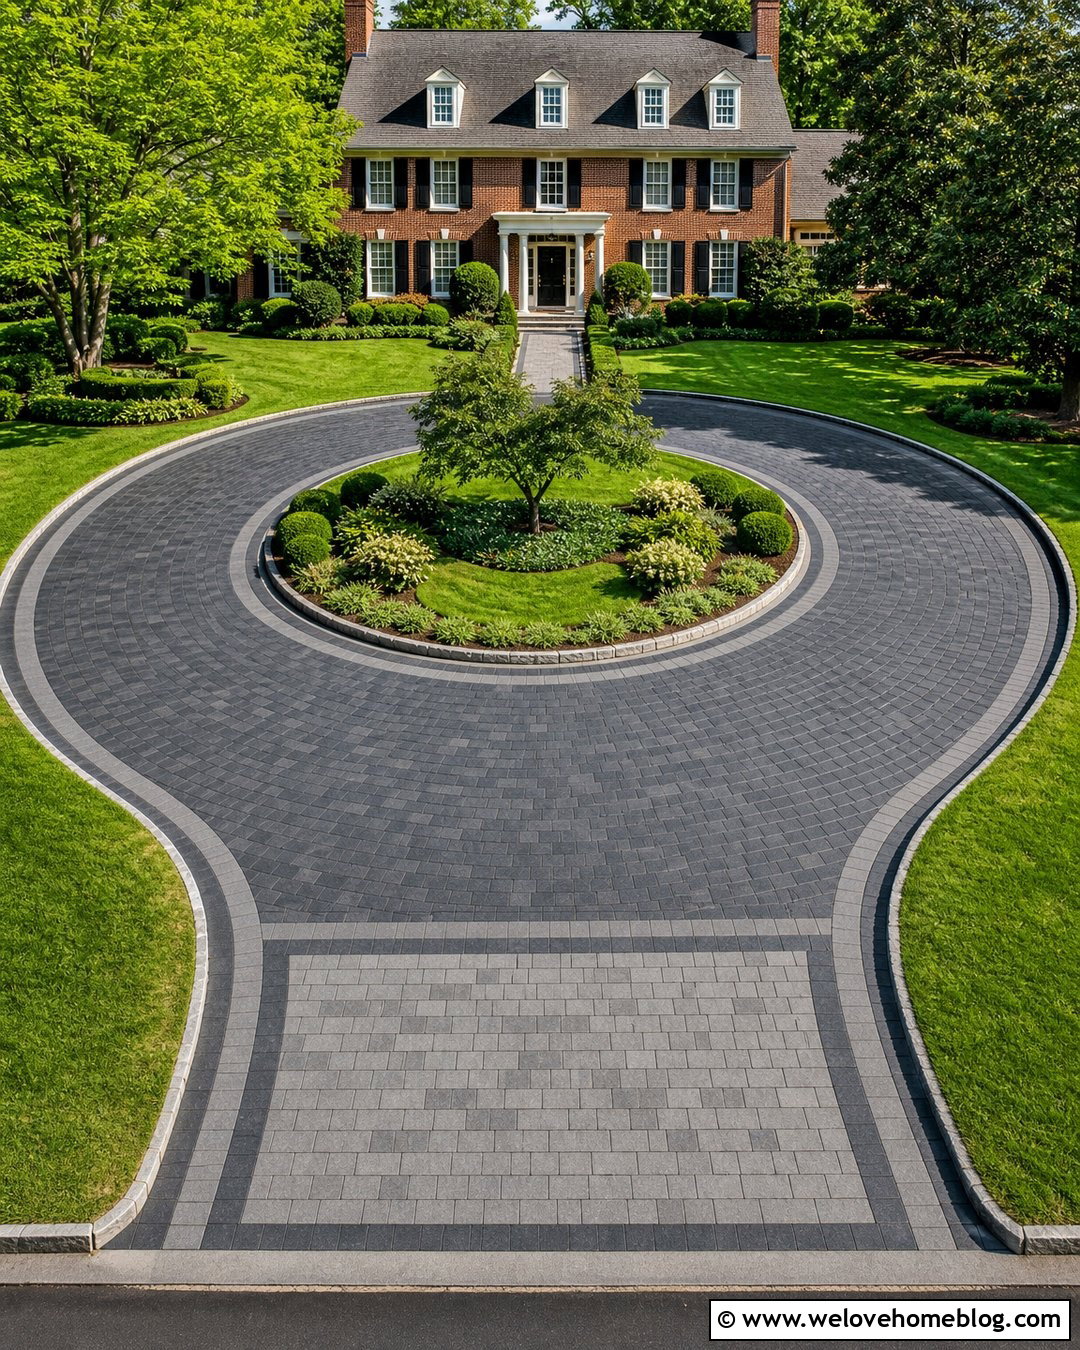
A circular driveway creates convenient vehicle flow while giving a larger front yard a strong focal point. Measure the property carefully so the entrance, exit, turning radius, parking areas, and center island all function together. Check local rules for multiple curb connections before finalizing the layout. Excavate the entire paved route, prepare drainage, compact the subgrade, and install a properly designed aggregate base. Use concrete pavers in a running bond or fan pattern that can follow the curves without excessive awkward cuts. Secure both inner and outer edges with substantial restraints. In the center, build a raised garden with a small ornamental tree, low shrubs, and ground cover that preserves clear visibility. A contrasting paver apron at each street connection and a matching walkway to the front door will unify the complete driveway.
15. Curved Concrete Driveway On A Slope
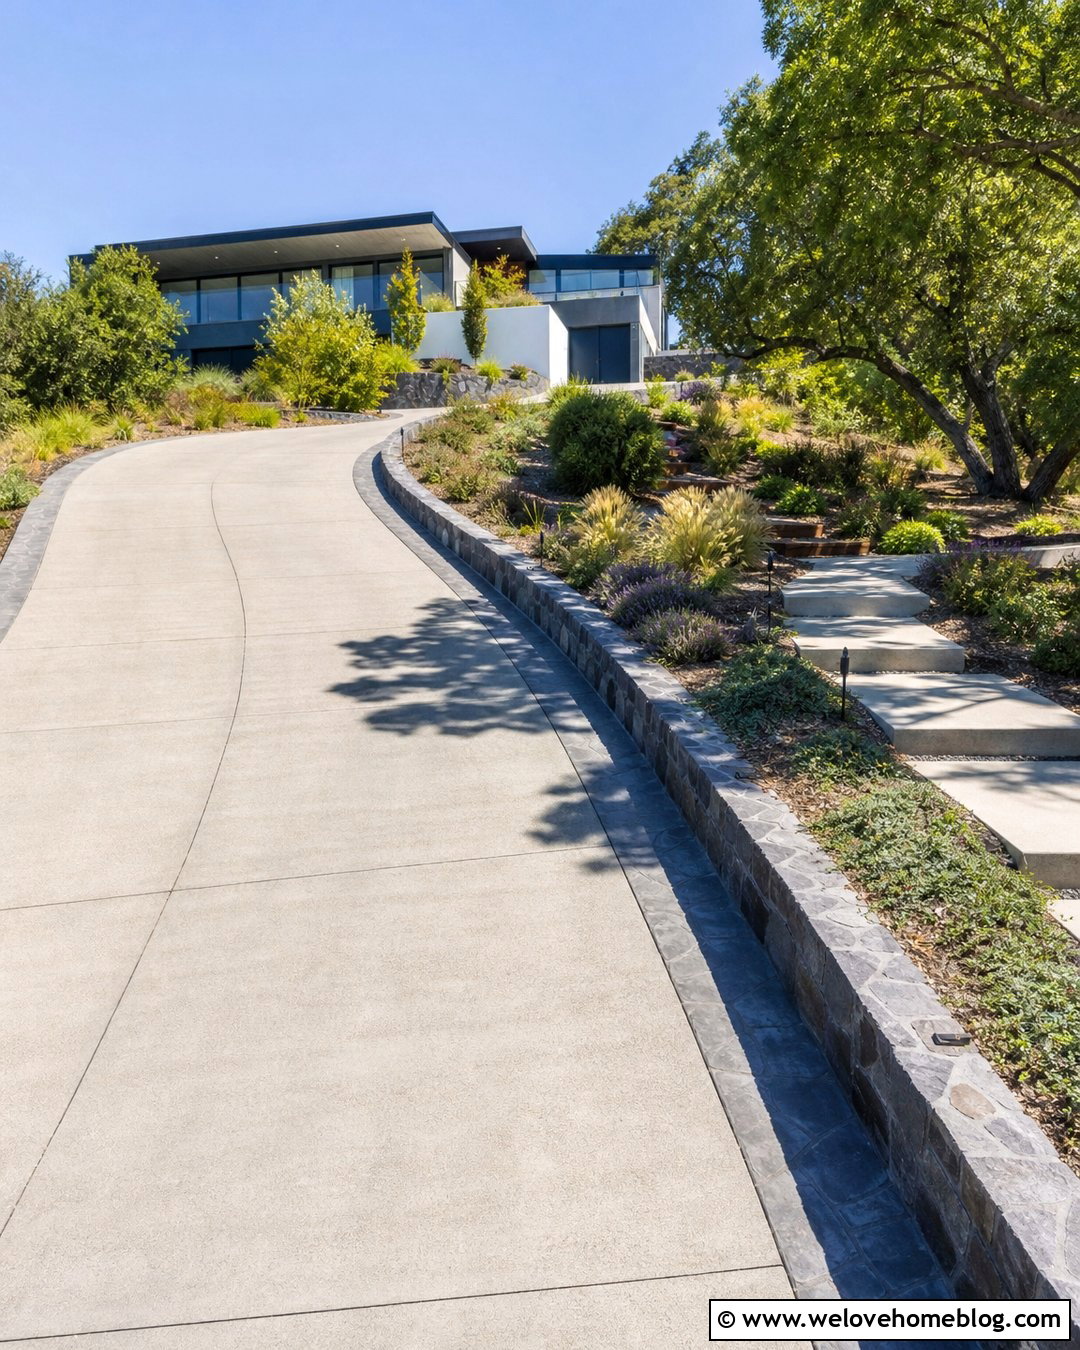
Sloped lots require a driveway that balances comfortable vehicle access with reliable water control. A gradual curve can reduce the visual severity of the climb and help the driveway follow natural contours. Begin with professional grading where the slope, soil, erosion risk, or connection to the road presents complications. Design the concrete surface with positive drainage and suitable transitions at the street and garage so vehicles do not scrape. Prepare and compact the subgrade, install the required base, and pour the driveway in manageable sections with correctly positioned joints. Use a broom or lightly textured finish for traction. Add stone curbing along vulnerable downhill edges and install swales, drains, or planted channels where necessary. Deep-rooted shrubs and erosion-resistant ground covers can stabilize adjoining beds without hiding the driveway’s edges or restricting sightlines.
16. Long Gravel Driveway With Tree-Lined Entrance
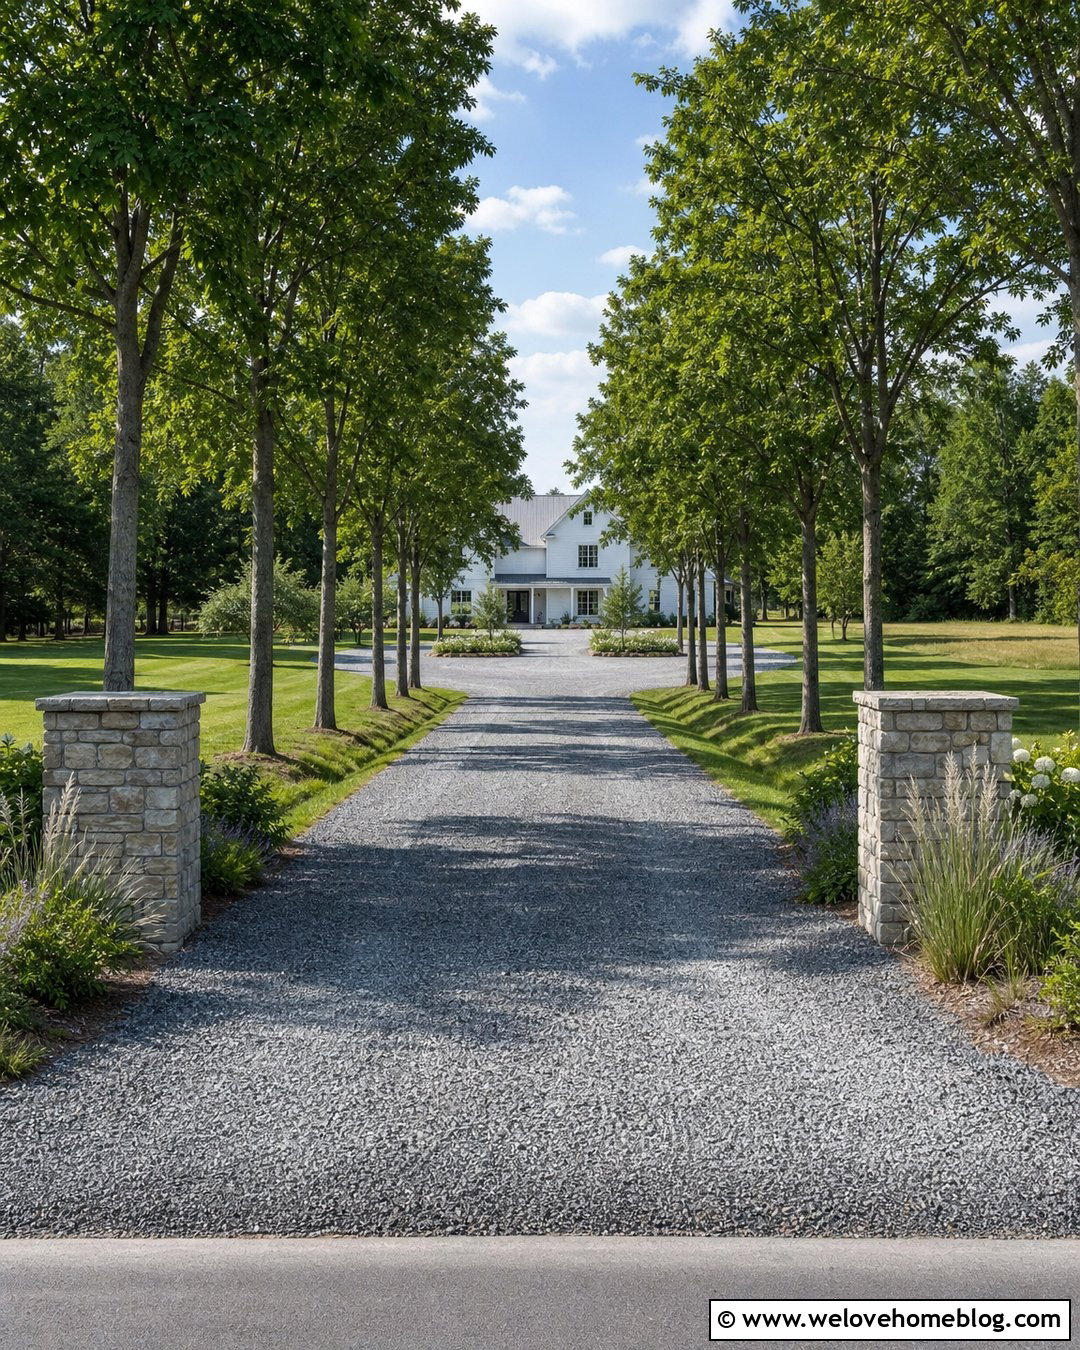
Crunching gravel and evenly spaced trees can make a long driveway feel established rather than empty. Start by selecting the safest route between the road and house, avoiding unnecessary steep grades, wet ground, sharp turns, and major tree roots. Clear the corridor, shape roadside ditches or shallow swales, and compact the prepared soil. Install geotextile where needed, followed by appropriately graded crushed aggregate in compacted layers. The finished surface should move water toward the sides instead of allowing it to travel down the wheel paths. Plant trees far enough from the driveway to accommodate mature trunks, roots, branches, snow storage, and maintenance equipment. Add a wider gravel arrival court near the house and use stone edging only around the formal parking area. Simple gateposts and low entrance planting can mark the road connection without narrowing access.
17. Driveway With Channel Drain And Paver Border
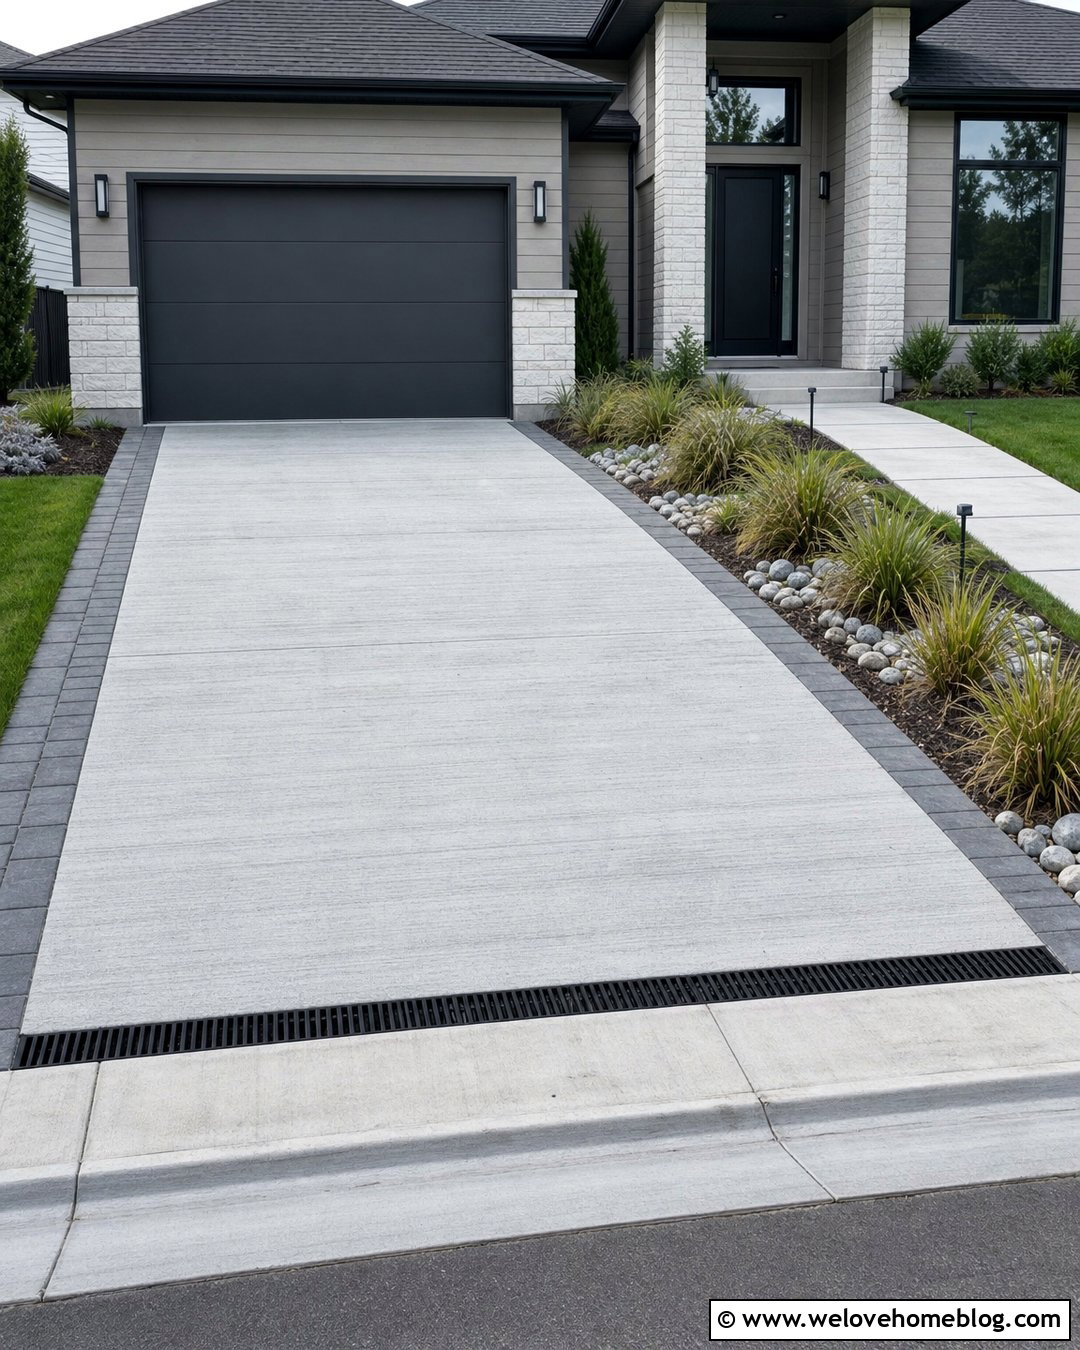
Heavy runoff often reveals driveway problems before surface wear becomes noticeable. If water moves toward the garage, redesign the driveway as a complete drainage system rather than adding a small drain at random. Establish new elevations, identify a legal discharge location, and determine whether a channel drain, catch basin, swale, or underground pipe is appropriate. The pavement structure should have positive surface and subsurface drainage without dips that hold water. FHWA guidance notes that drainage layers need suitable grades and outlets to remove accumulated moisture effectively. () A broom-finished concrete driveway can include a channel drain before the garage and a dark concrete-paver border along both sides. Plant rain-tolerant grasses near the outlet, stabilize exposed soil, and keep mulch from washing onto the drain grate or driving surface.
18. Driveway With Retaining Wall And Lighting
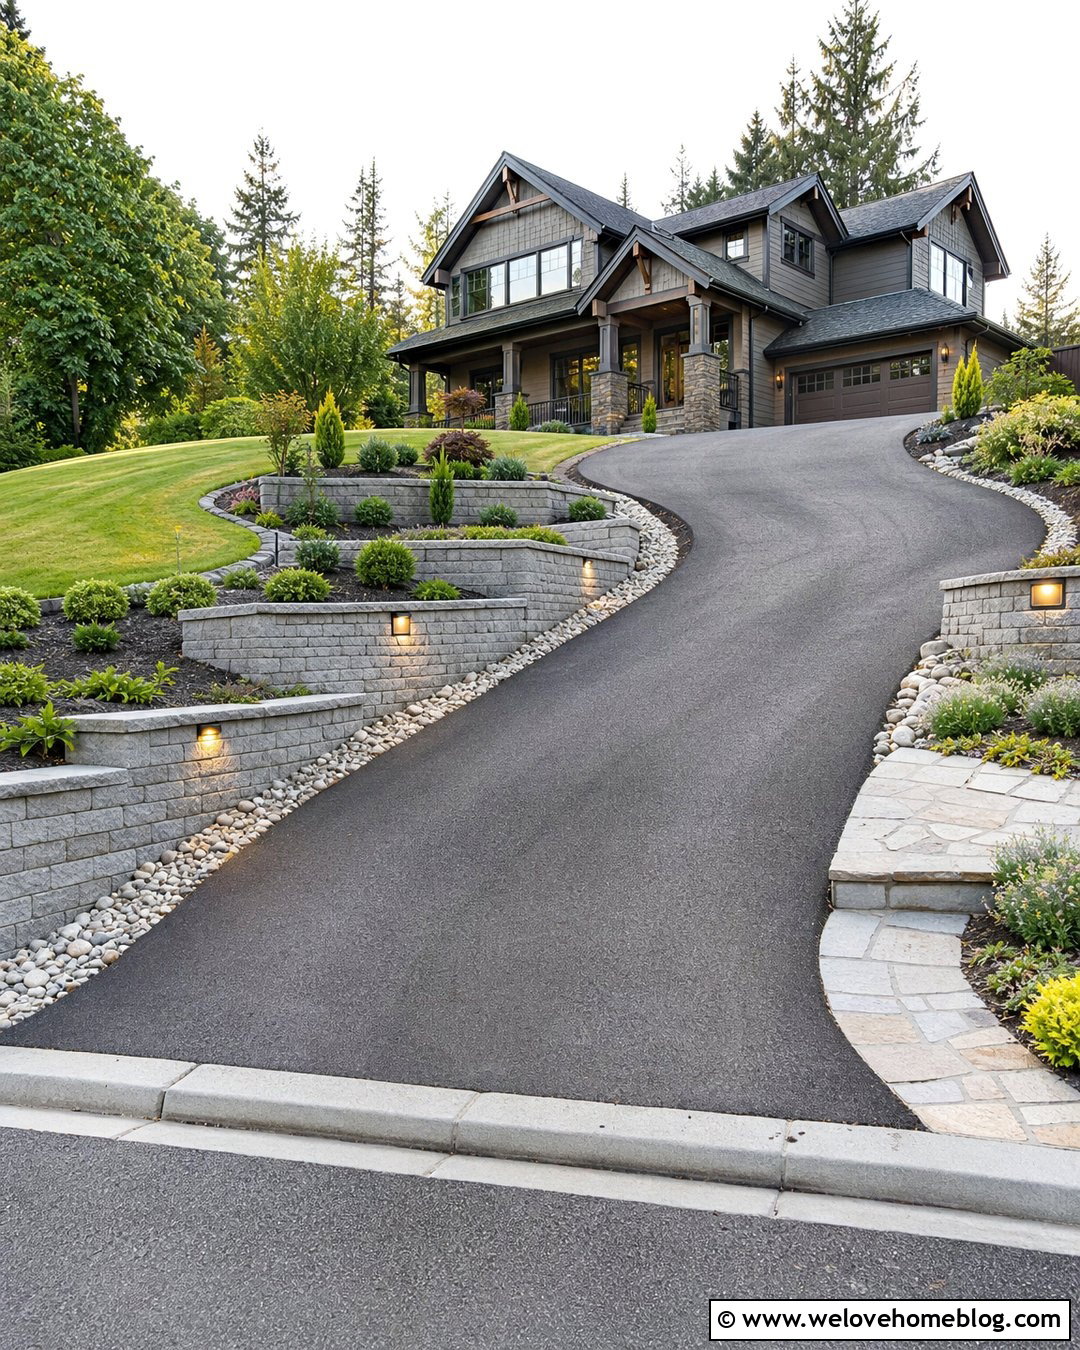
A driveway cut into a hillside may need retaining walls to create stable edges and usable width. Begin with engineering input when wall height, surcharge from vehicles, drainage, or unstable soil exceeds simple landscape construction. Excavate and build the wall foundation according to the selected system. Include drainage stone, filter fabric, and properly placed outlets so trapped water does not push against the wall. Construct the driveway base and surface only after the wall area is stable and elevations are confirmed. A gray asphalt driveway paired with light-colored segmental retaining walls creates a clean contrast. Add recessed or low-voltage fixtures along the wall, but position them where tires, snowplows, and maintenance equipment cannot strike them. Finish the upper slope with low shrubs and ground covers. A guardrail or barrier may also be necessary where a steep drop borders the driveway.
19. Gated Paver Driveway With Brick Pillars
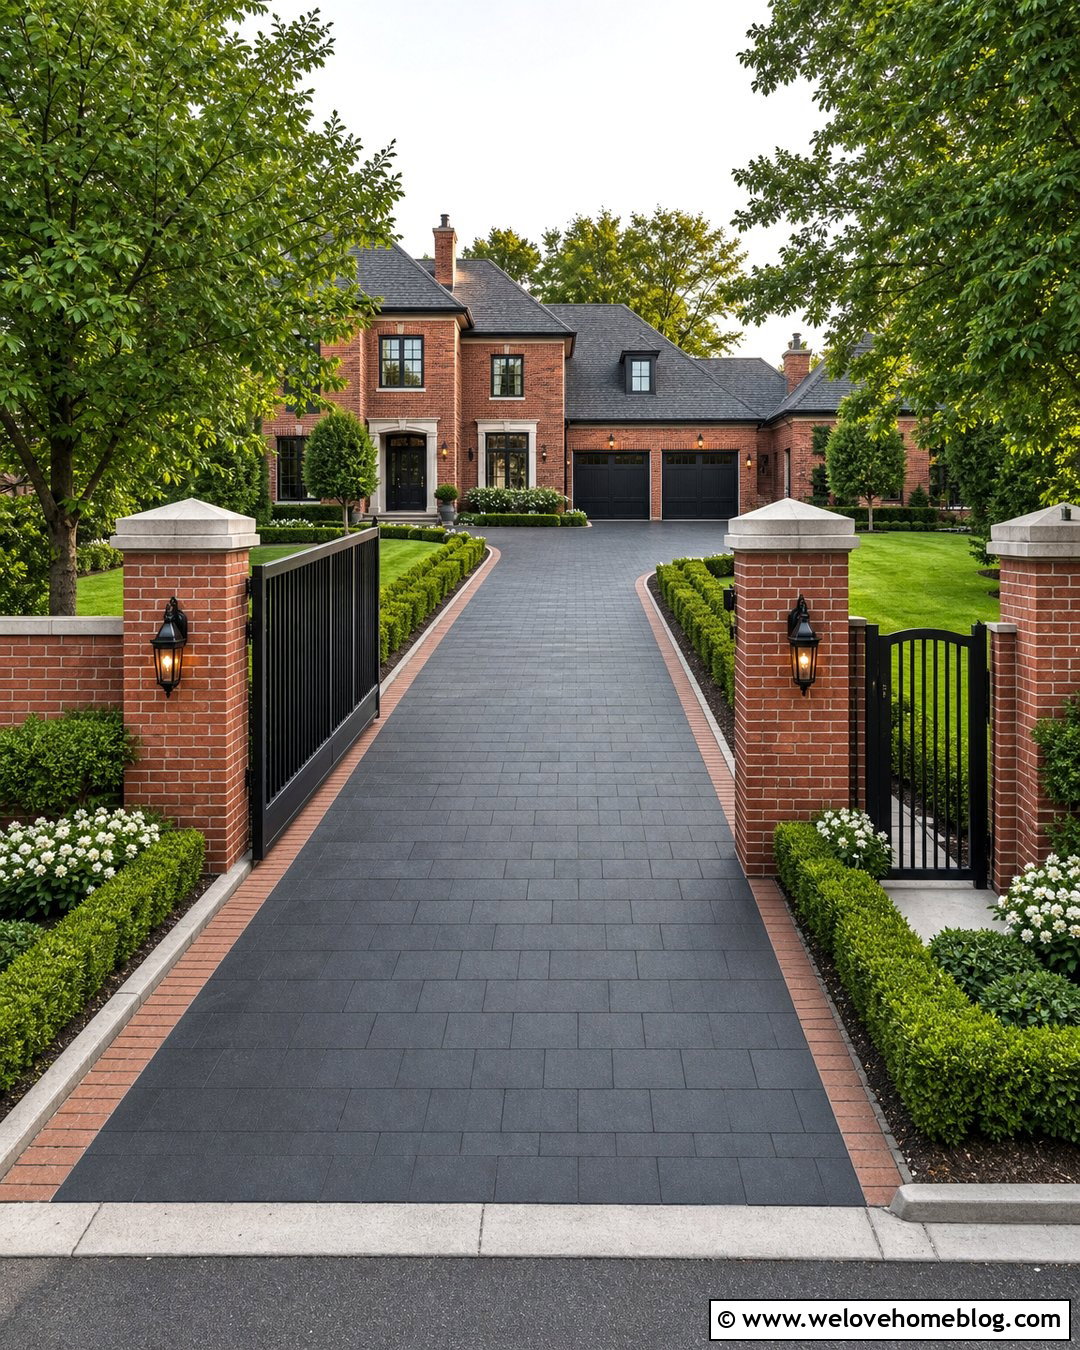
A gated driveway should feel welcoming while providing enough room for vehicles to stop safely away from the street. Plan the gate position, swing or sliding direction, underground utilities, delivery access, emergency access, drainage, and automation before paving begins. Build structural footings for brick pillars independently from the driveway surface so movement does not damage the paving. Install electrical conduits, sensors, and drainage sleeves during base construction rather than cutting through completed work later. A straight driveway surfaced with charcoal concrete pavers and edged in warm red brick can connect the pillars to a traditional home. Set the gate back far enough for convenient entry and preserve clear sightlines at the road. Low hedges, matching pedestrian access, and discreet lighting complete the design without crowding the entrance or concealing operating equipment.



20. Mixed Material Driveway Built In Phases
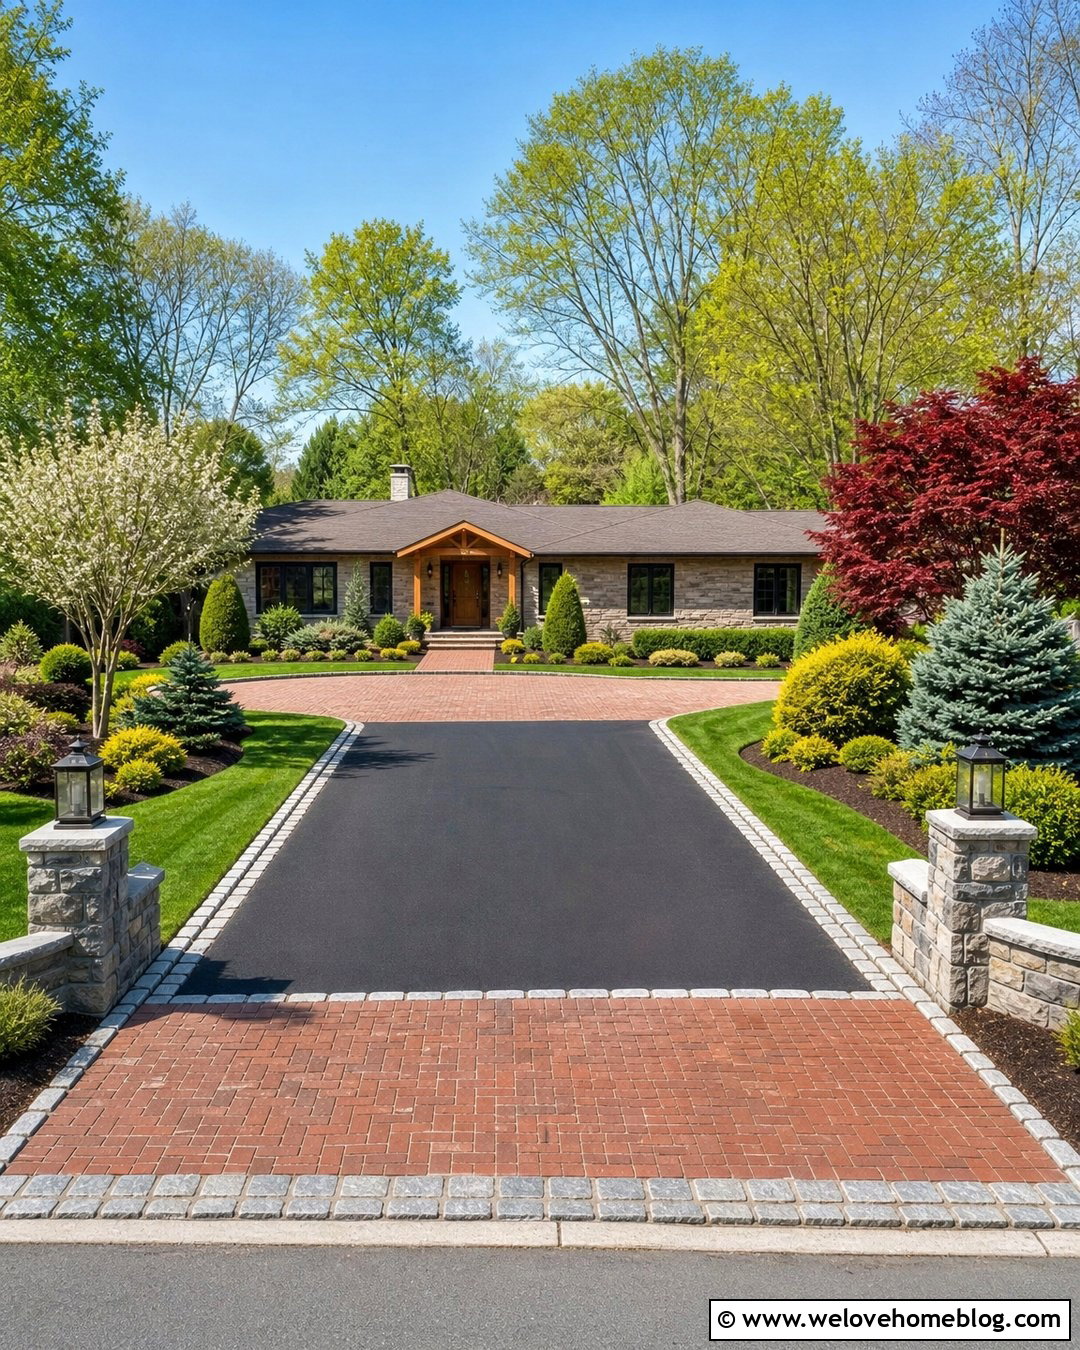
When the budget cannot cover a fully finished driveway immediately, create a phased plan that avoids paying for the same work twice. Design the final width, drainage, elevation, utility crossings, edging, and parking layout at the beginning. Complete the essential excavation and compacted aggregate base first, then use a well-graded crushed stone surface until funds allow permanent paving. Later, add asphalt or concrete to the main driving lanes and reserve higher-cost brick or concrete pavers for the apron, borders, or parking court. Make sure every temporary stage drains correctly and remains safely contained. A mixed design might combine black asphalt, a red brick entrance apron, and granite edging beside simple lawn and shrubs. Document base depths and buried conduits before covering them, making future gate, lighting, irrigation, or drainage work easier.
Conclusion:
The strongest driveway designs begin below the visible surface. Careful layout, stable soil, compacted base material, controlled drainage, durable edging, and suitable pavement all work together to prevent avoidable damage. Match the design to your climate, vehicle loads, maintenance preferences, home style, and realistic budget. Before construction, verify permits, curb-cut requirements, utility locations, stormwater rules, and contractor specifications. Gravel offers flexibility, while asphalt and concrete provide familiar paved surfaces. Brick, cobblestone, resin, and pavers add character when supported by the correct foundation. Whether you choose a simple straight approach or an elaborate gated entrance, these **20 How To Build A Driveway Ideas** can help you plan a practical project with lasting curb appeal.

Related posts:





Leave a Reply